Electron in Practice: Managing Electron Projects with Monorepo
Table of Contents
Preface
This article explains how to manage an Electron project using monorepo.
Code: https://github.com/uikoo9/dishi-monorepo/tree/electron-monorepo
Initialization
First, initialize a monorepo frontend project.
For detailed steps, see: Initializing a Frontend Monorepos Project
After initialization, the project structure looks like this:
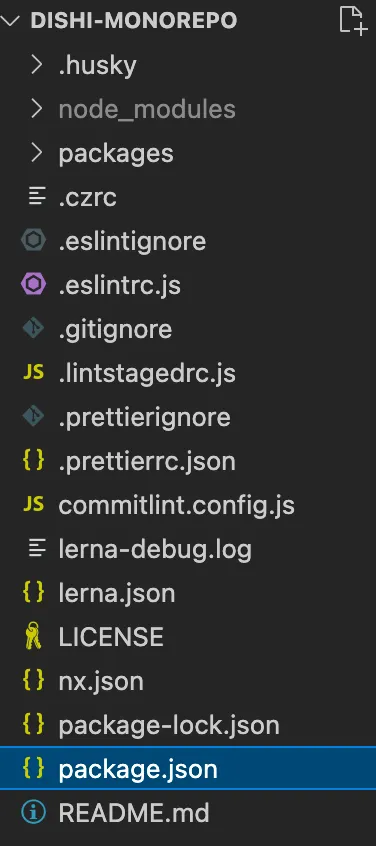
Renderer Process
The benefits of using monorepo to manage the project:
-
Each platform or module only needs to manage its own package
-
Inter-package dependencies are handled cleanly
In this article, the renderer process is in packages/dishi-renderer,
implemented with React + Webpack:

The specific technology isn’t restricted —
you can use React, Vue, or even jQuery.
Build tools can be Webpack, Rollup, Vite, etc.
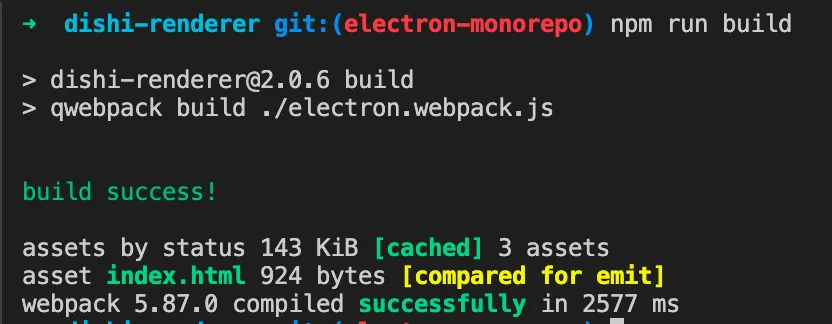
But you need a build command:
  "scripts": {
    "build": "qwebpack build ./electron.webpack.js"
  },
This build command generates the renderer process output
into the packages/dishi-main/renderer folder.
The benefits of this approach:
1. Independence
The renderer process is essentially traditional frontend web development.
It only needs to focus on its own package, i.e. packages/dishi-renderer.
You can use any technology you want, as long as it achieves the desired UI.
2. Lean
Only the final build output is placed in the main process folder.
This avoids pulling in extra npm dependencies,
reducing the final app bundle size.
3. Caching
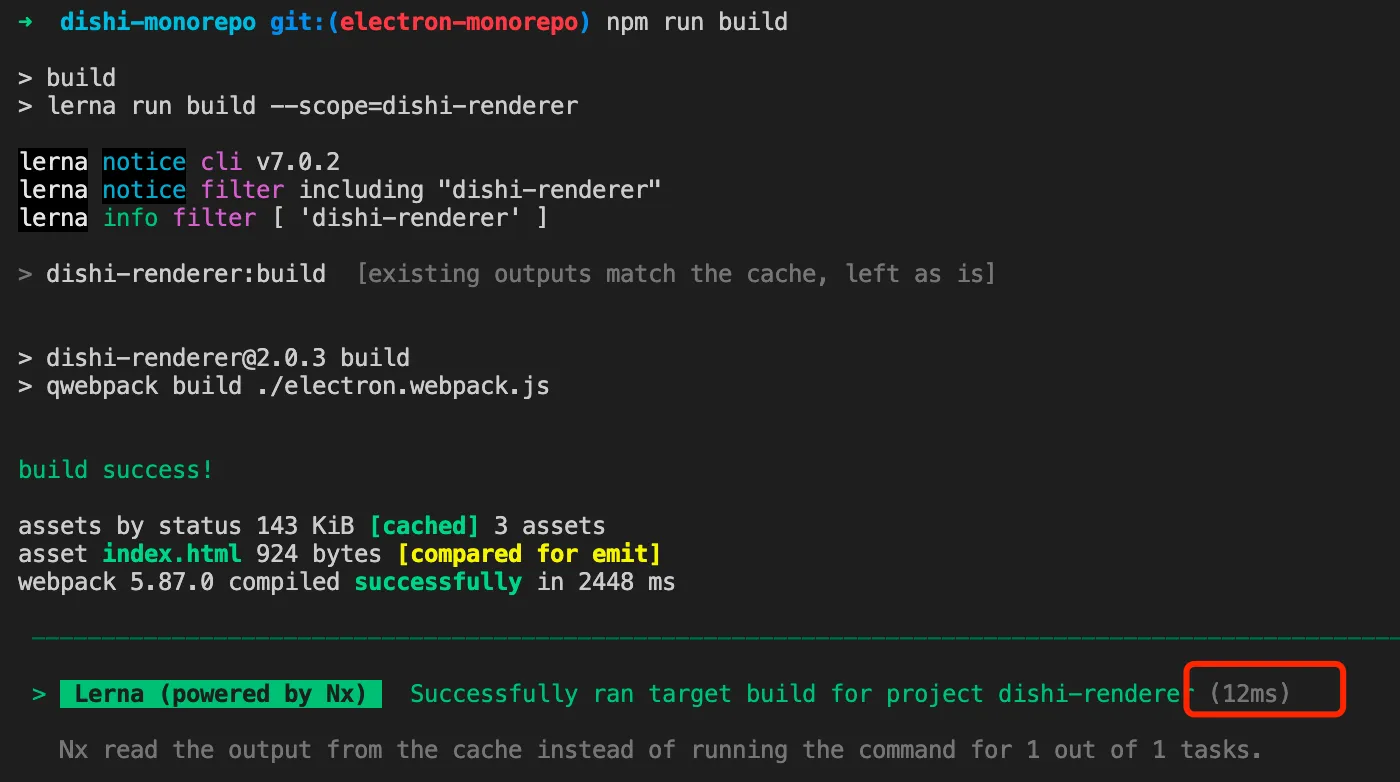
If you use Lerna and NX to manage the project:
Learn to Manage Multiple npm Packages with Lerna
You can add the following command to the root package.json:
{
    "build": "lerna run build --scope=dishi-renderer",
}
This enables NX’s caching capability:
Without NX, each build takes about 2-3 seconds:
With NX and no source changes, each build takes milliseconds:
Main Process
In this article, the main process is in packages/dishi-main:
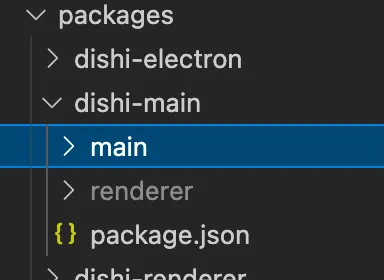
The main process code is in the main folder.
The renderer process code is built by the dishi-renderer package into the renderer folder.
The package.json is also quite simple,
since it serves as the entry point after packaging:
{
  "name": "dishi",
  "private": true,
  "version": "2.0.3",
  "main": "main/index.js",
  "dependencies": {
    "qiao-electron": "^3.2.6",
    "qiao-json": "^3.1.2",
    "qiao-sqlite": "^3.2.3"
  }
}
Starting and Packaging
You might wonder —
why isn’t there a start command in the main process package.json?
This is where packages/dishi-electron comes in.
This package serves two purposes:
-
Provides the Electron environment during development
-
Packages the application
Starting
Starting means using the electron package to launch the app locally.
But the electron package doesn’t need to be a dependency of the main process,
because packaging tools will bundle the Electron runtime.
So in dishi-electron, the dependencies look like this:
{
  "name": "dishi-electron",
  "private": true,
  "version": "2.0.6",
  "devDependencies": {
    "electron": "^25.1.1"
  },
  "scripts": {
    "start": "electron ../dishi-main"
  }
}
You can use the start command to launch the app locally.
A convenience command can also be added to the root package.json:
{
    "build": "lerna run build --scope=dishi-renderer",
    "start": "npm run build && npm run start -w dishi-electron"
}
Packaging
The other capability is packaging the application.
The complete package.json:
{
  "name": "dishi-electron",
  "private": true,
  "version": "2.0.6",
  "devDependencies": {
    "electron": "^25.1.1",
    "electron-icns": "^3.2.3",
    "qiao-electron-cli": "^3.3.0",
    "qiao-file": "^3.1.9"
  },
  "scripts": {
    "start": "electron ../dishi-main",
    "icon": "electron-icns ./pack/icon/pic.png",
    "dist": "gulp -f ./pack/gulp/pack-dist.js",
    "packmac": "qelectron pm ./pack/electron.config.js",
    "packdmg": "qelectron pd ./pack/electron.config.js",
    "uploaddmg": "qelectron ud ./pack/electron.config.js"
  }
}
Packaging details are covered in other articles.
Summary
-
Using monorepo to manage an Electron project
-
packages/x-renderer for renderer process code
-
packages/x-main for main process code
-
packages/x-electron for providing the local Electron environment and packaging the app
Related Articles
Electron in Practice: Local Logging
Preface: After developing a local app with Electron, local logging is essential. It helps capture user actions and locate bugs. Local logs differ from real-time analytics — they are larger, more detailed, and not all information is suitable for reporting. Similarities and Differences with Node.js Logging: Writing local logs in Electron is similar to Node.js.
Electron in Practice: Registering Shortcuts
Preface: This article introduces how to register keyboard shortcuts in an Electron app. Main Process: Registering shortcuts in the main process is straightforward — just make sure to do it after app ready. Common key mappings: https://www.electronjs.org/docs/latest/api/accelerator. Also remember to unregister all shortcuts when the app quits.
Electron in Practice: Update Strategies
Preface: After developing a desktop app with Electron, the next question is how to update subsequent versions. This article introduces several update strategies. Electron Architecture: An Electron desktop app consists of several parts: the Electron runtime itself, the main process (Node.js and non-Node.js parts), and the renderer process.
Electron in Practice: Customizing Mac Menus
Preface: Previous articles covered developing an Electron app through to Mac packaging. Related articles: Learn Electron in One Article, Electron in Practice: Local Database SQLite, Electron in Practice: Managing Electron Projects with Monorepo, Electron in Practice: Mac Packaging, Electron in Practice: Registering an Apple Developer Account.
Electron in Practice: Package Size Optimization
Preface The previous articles covered developing an Electron app through to Mac packaging. Related articles: Learn Electron in One Article, Electron in Practice: Local Database SQLite, Electron in Practice: Managing Electron Projects with Monorepo, Electron in Practice: Mac Packaging, Electron in Practice: Register