The Powerful Build System: NX
Preface
NX is a powerful build system.
That might sound vague,
so this article walks through a project to help you understand NX.
Feel free to explore on your own: https://nx.dev/
Some typical use cases for NX:
-
Package-based monorepo management
-
Complete frontend project management
-
React, Angular, and other project management
-
Node.js project management
This article introduces NX from the monorepo perspective.
Creating a Project
You can use the nx-cli tool to create a project.
One approach is to use npx without installing NX globally:
npx create-nx-workspace@latest package-based --preset=npmAnother approach is to install NX globally:
npm install -g nxThis article uses the global installation approach.
After installation, initialize the project with:
nx initAfter some CLI interactions, the project will be created.

A monorepo project is created with the following file structure:
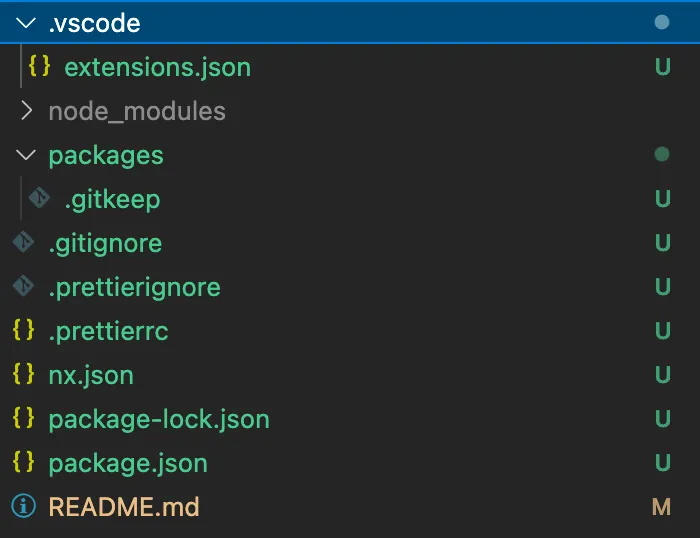
As you can see, a typical monorepo file structure is already set up.
Interestingly, the README contains two commands:

These two commands will be covered later.
Building the Project
As mentioned at the beginning, NX is a build system.
To distinguish it from common build tools like webpack and rollup:
NX manages the entire project, rather than being a specific build tool.
Create a folder packages/is-even with the following structure:

As you can see, rollup is used here for building.
The NX official demo uses tsc for building.
So NX doesn’t get involved with specific build tools —
it’s a build system for managing projects.
package.json contents:
{
  "name": "is-even",
  "version": "0.0.0",
  "main": "index.js",
  "scripts": {
    "build": "rollup -c"
  }
}
src/index.js contents:
export const isEven = (x) => x % 2 === 0;The is-even folder has a build command.
With NX, you don’t need to navigate into packages/is-even to build.
Just run the following command from the root:
nx build is-evenResult:
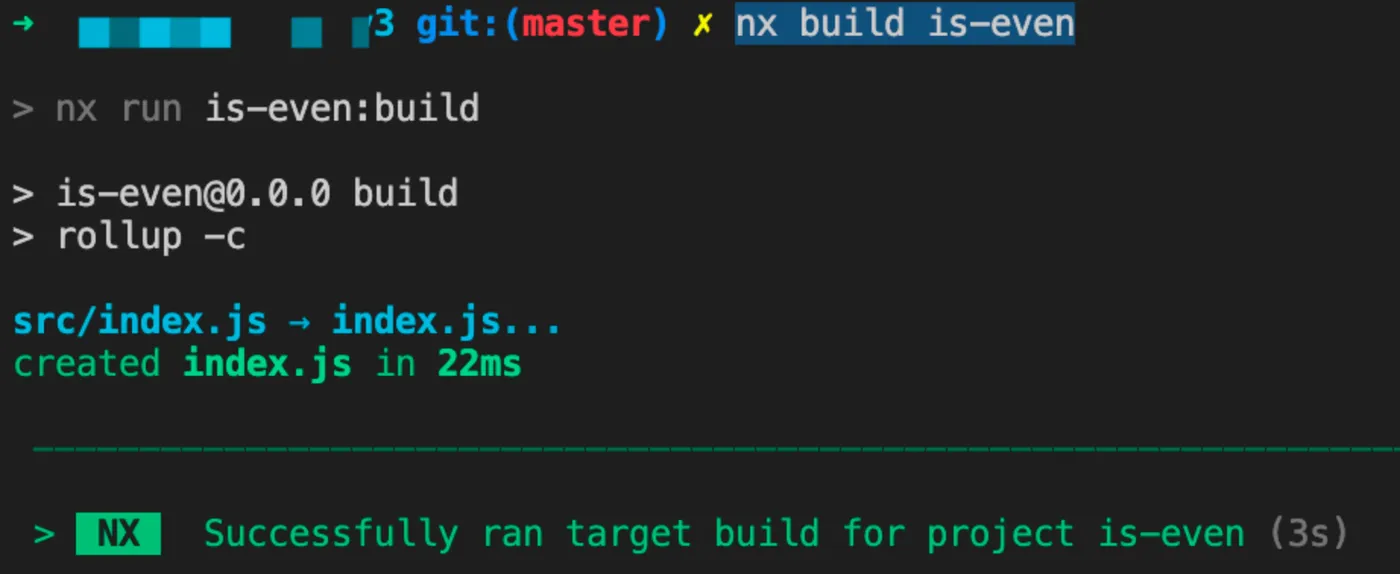
Building from the root without entering packages is one of NX’s features.
Managing Task Dependencies
Next, create an is-odd folder, similar to is-even.
The key index.js content:
import { isEven } from 'is-even';

export const isOdd = (x) => !isEven(x);
Here you can see that the is-odd package depends on is-even.
Running nx build is-odd, the result:
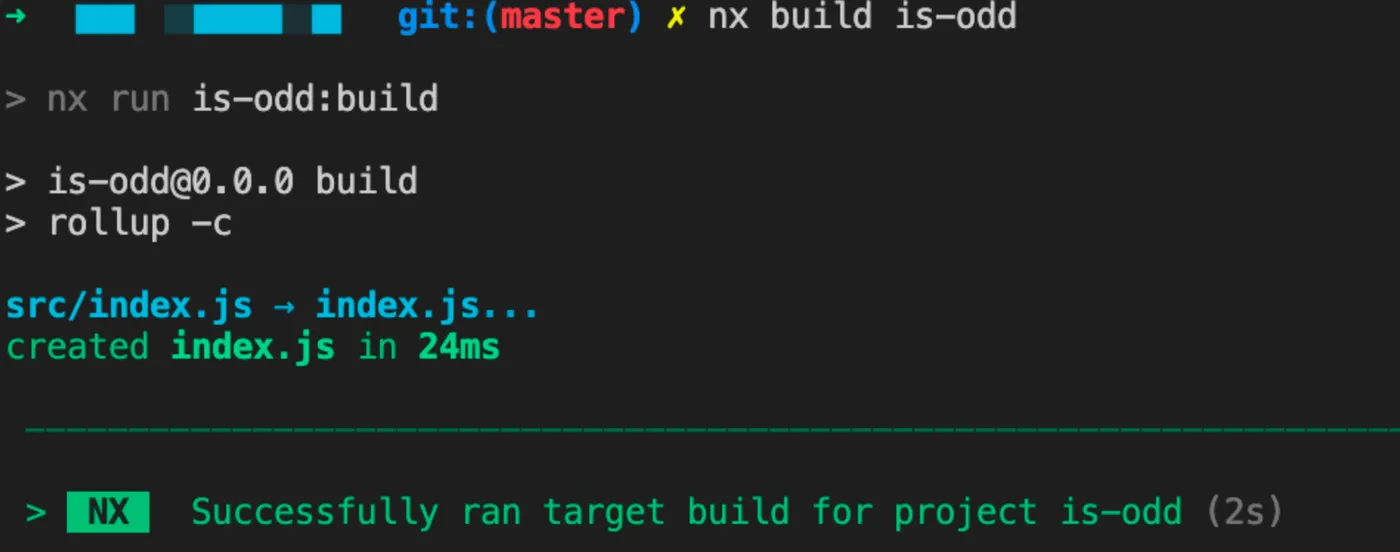
Although it succeeded,
the built is-odd code will require is-even,
so ideally is-even should be built before is-odd each time.
In other words, is-odd’s build depends on is-even’s build.
Just add the following to nx.json:
{
  ...
  "targetDefaults": {
    "build": {
      "dependsOn": ["^build"]
    }
  }
}
This means the build task depends on the build completion of its dependencies.
i.e., building is-odd requires building is-even first.
Let’s see the result:
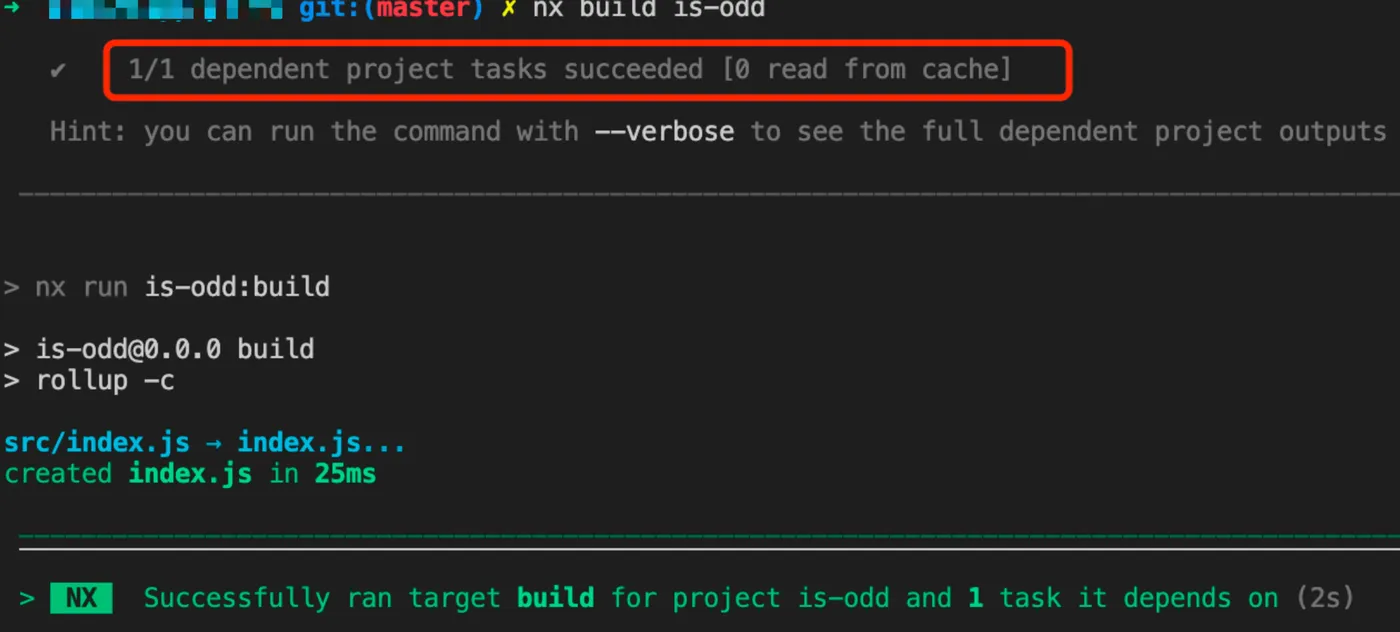
When building is-odd again, it automatically finds and builds dependencies.
Managing task dependencies across packages is another NX feature.
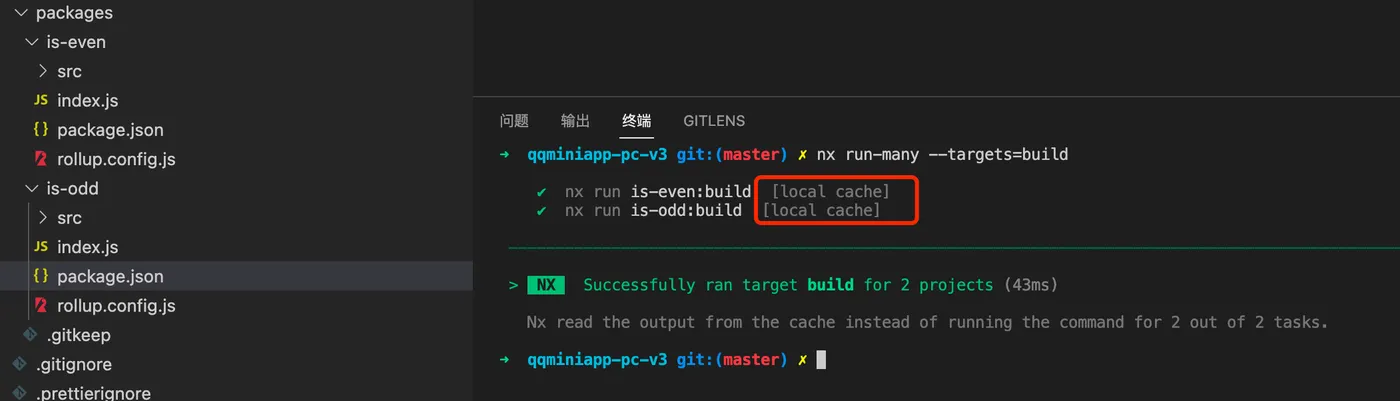
Using Cache
When running the following command again,
NX will use the previous cache by default:
nx build is-odd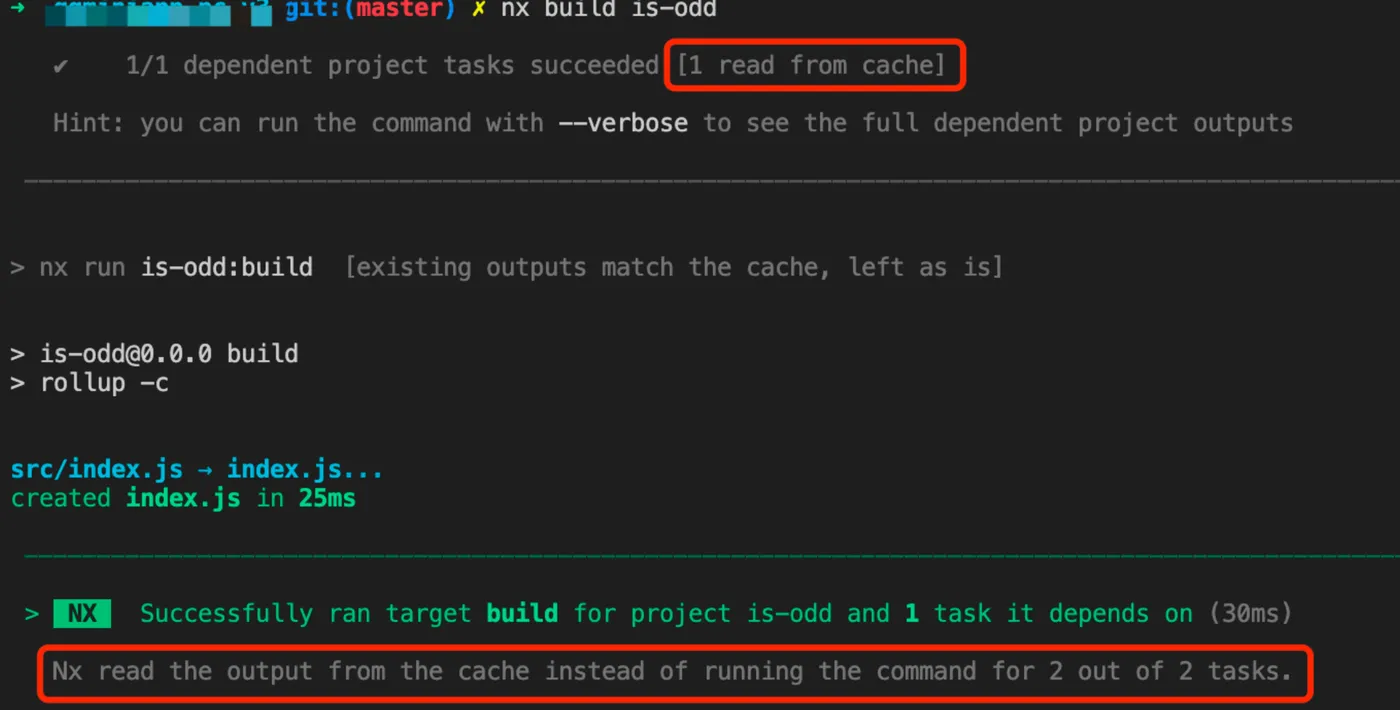
Default caching is another NX feature.
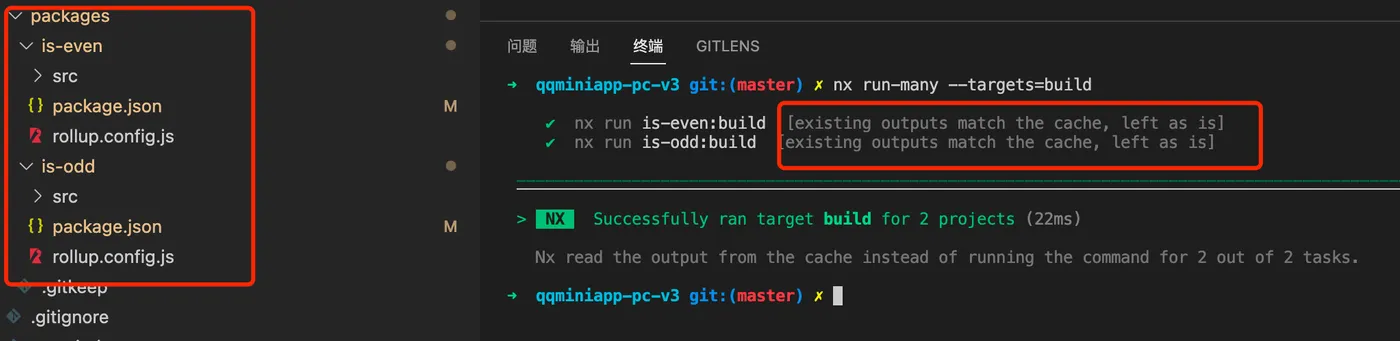
Multi-package Task Execution
NX also supports executing tasks across multiple packages simultaneously:
nx run-many --target=build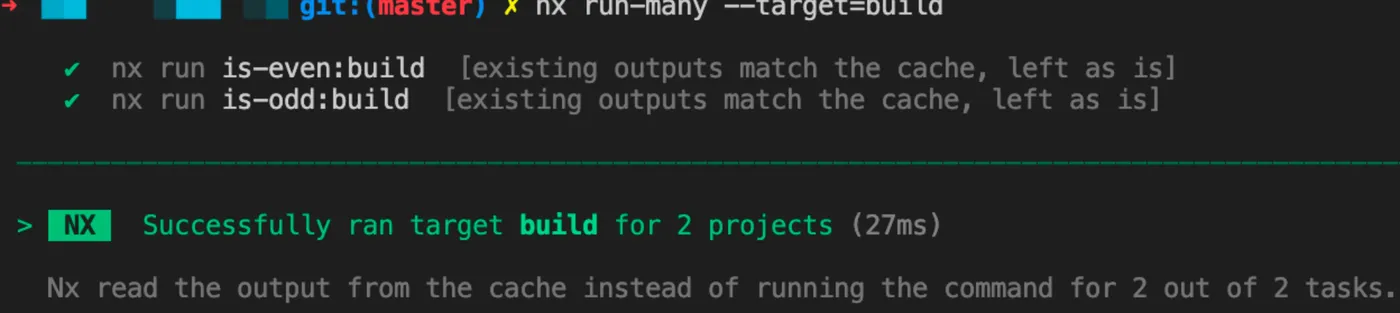
Multi-package task execution is another NX feature.
Executing Tasks
NX is a build system, not a build tool.
NX manages code projects, which can use various build tools.
A primary function is task execution.
Task definition is straightforward —
scripts in package.json define tasks.
For example, the following defines a build task for the is-even package:
{
  "name": "is-even",
  "version": "0.0.0",
  "main": "index.js",
  "devDependencies": {},
  "scripts": {
    "build": "rollup -c"
  }
}
Execute a single task:
nx run is-even:buildExecute multiple tasks:
npx nx run-many --target=buildEnable caching —
add the following config to nx.json to enable local caching:
  "tasksRunnerOptions": {
    "default": {
      "runner": "nx/tasks-runners/default",
      "options": {
        "cacheableOperations": ["build", "lint", "test", "e2e"]
      }
    }
  },
Result after enabling caching:

Using Distributed Cache
The local cache above is of limited value.
When code changes, local cache effectiveness is weak.
NX’s most impressive feature is nx-cloud.
Simply put, it supports cloud caching.
Within a team,
when one person builds locally,
the cache can be synced to the cloud.
Other team members can then share the cloud cache on subsequent builds.

Connect to nx-cloud:
nx connect-to-nx-cloudResult:
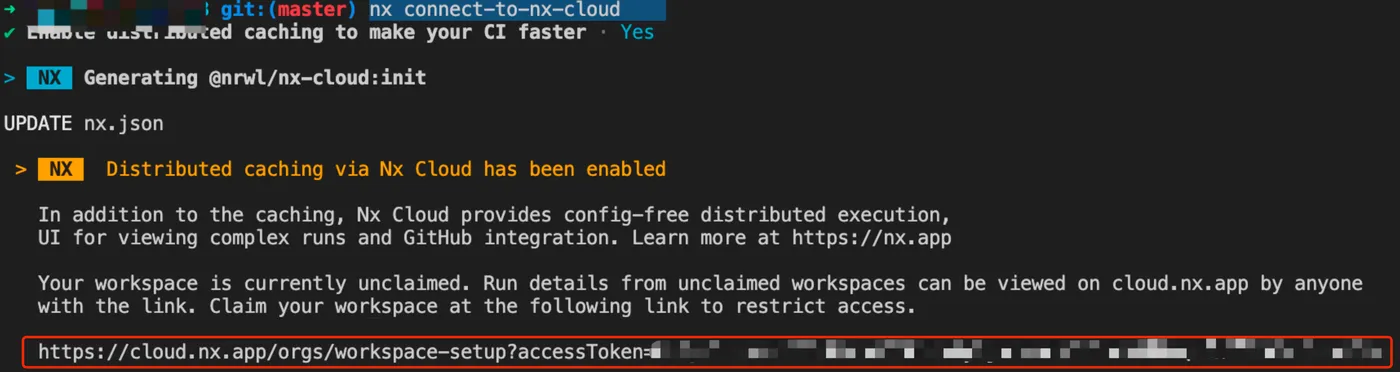
Visit the URL shown above. You’ll need to register. After logging in,
NX will bind the locally generated accessToken to your account.
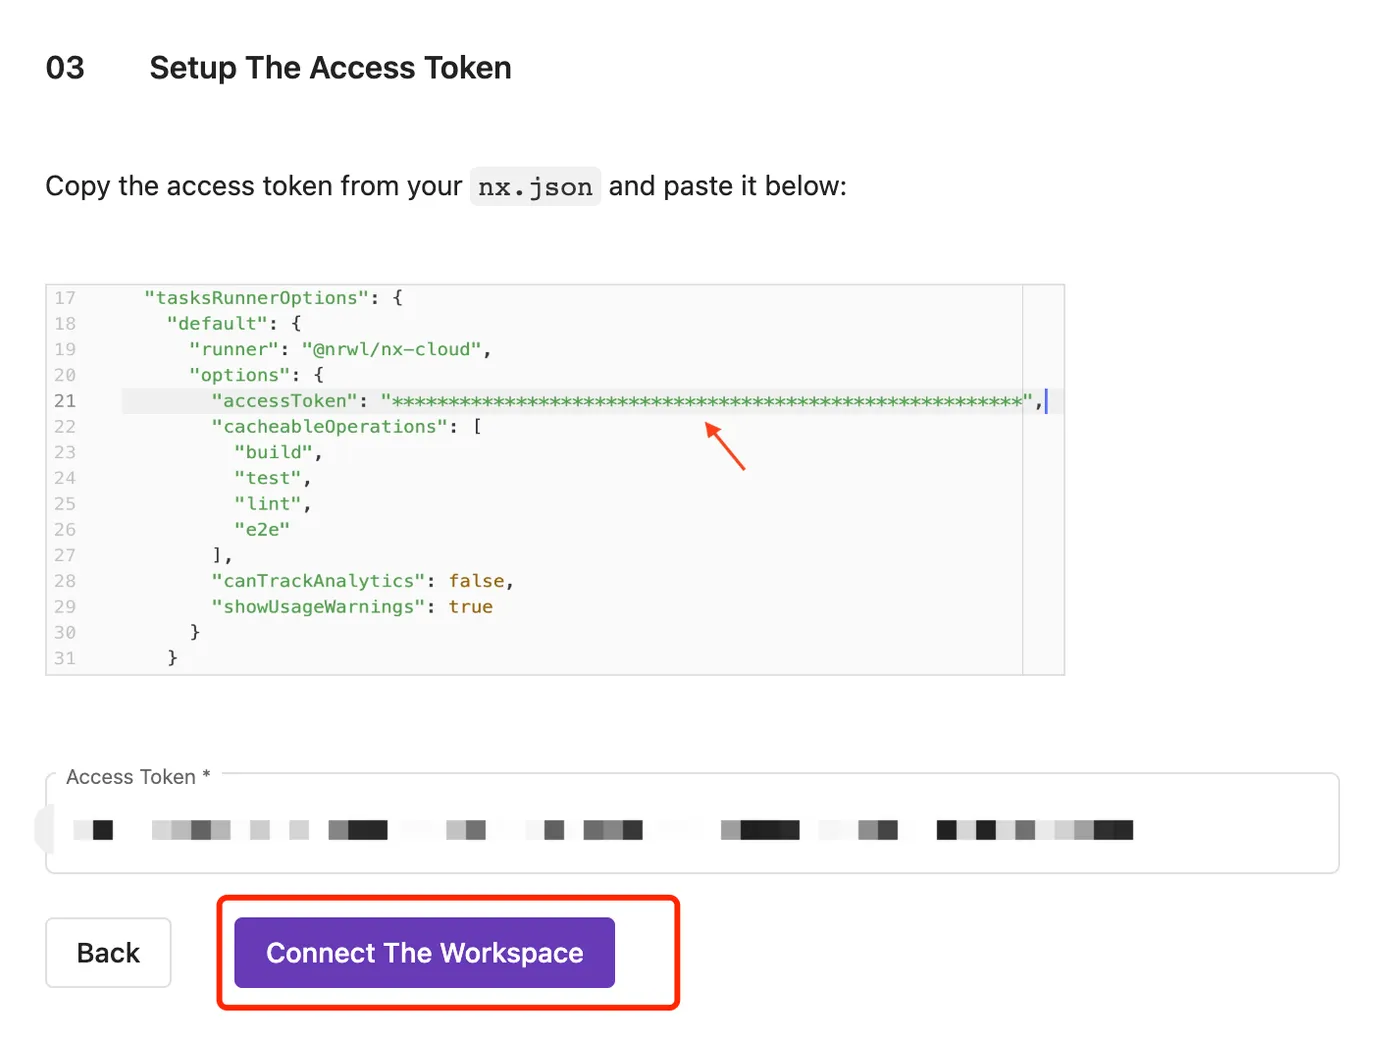
Then follow the prompts to run a few commands:
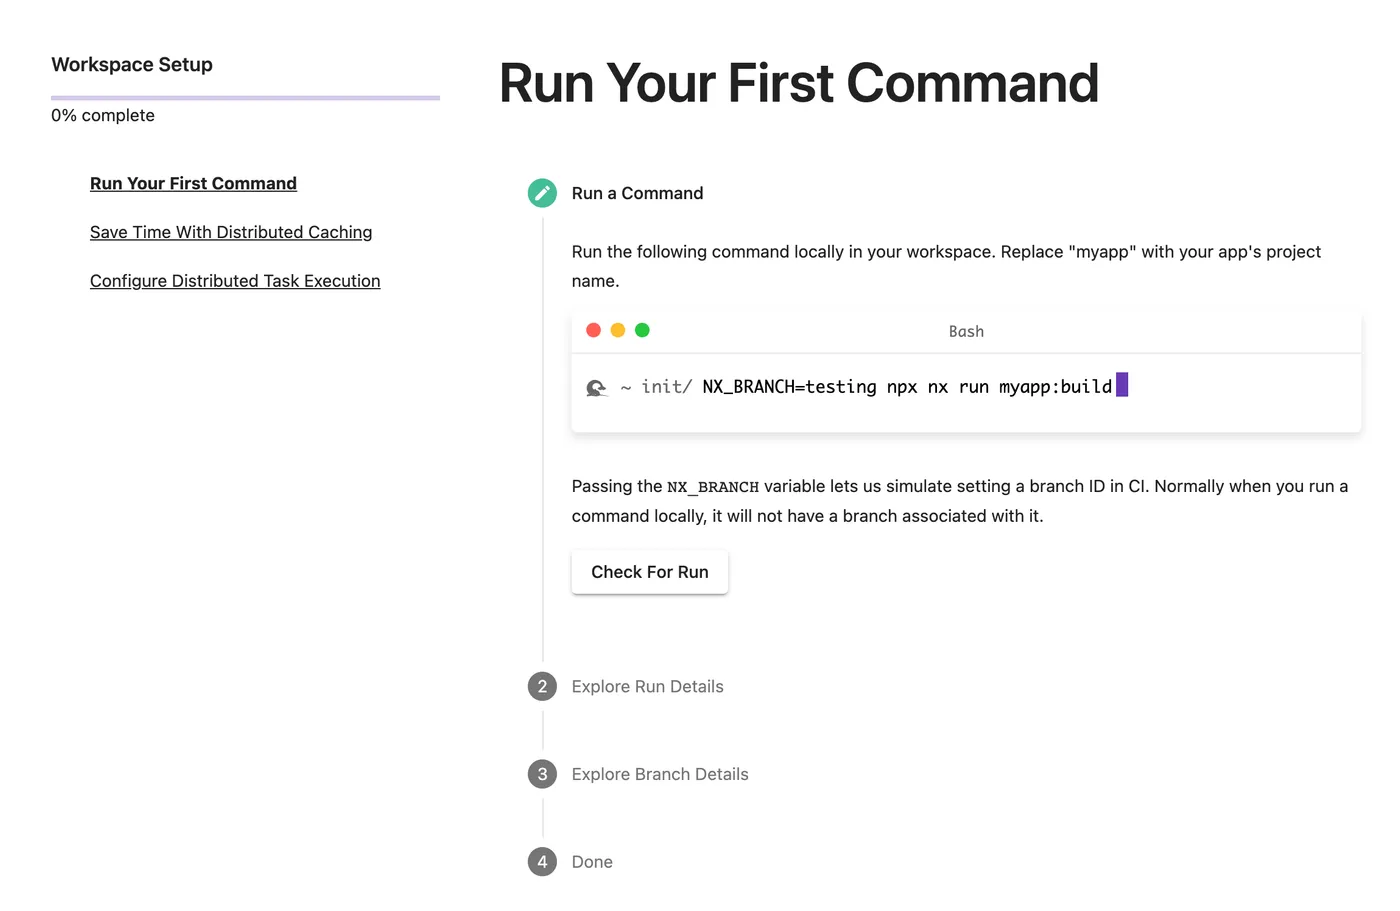
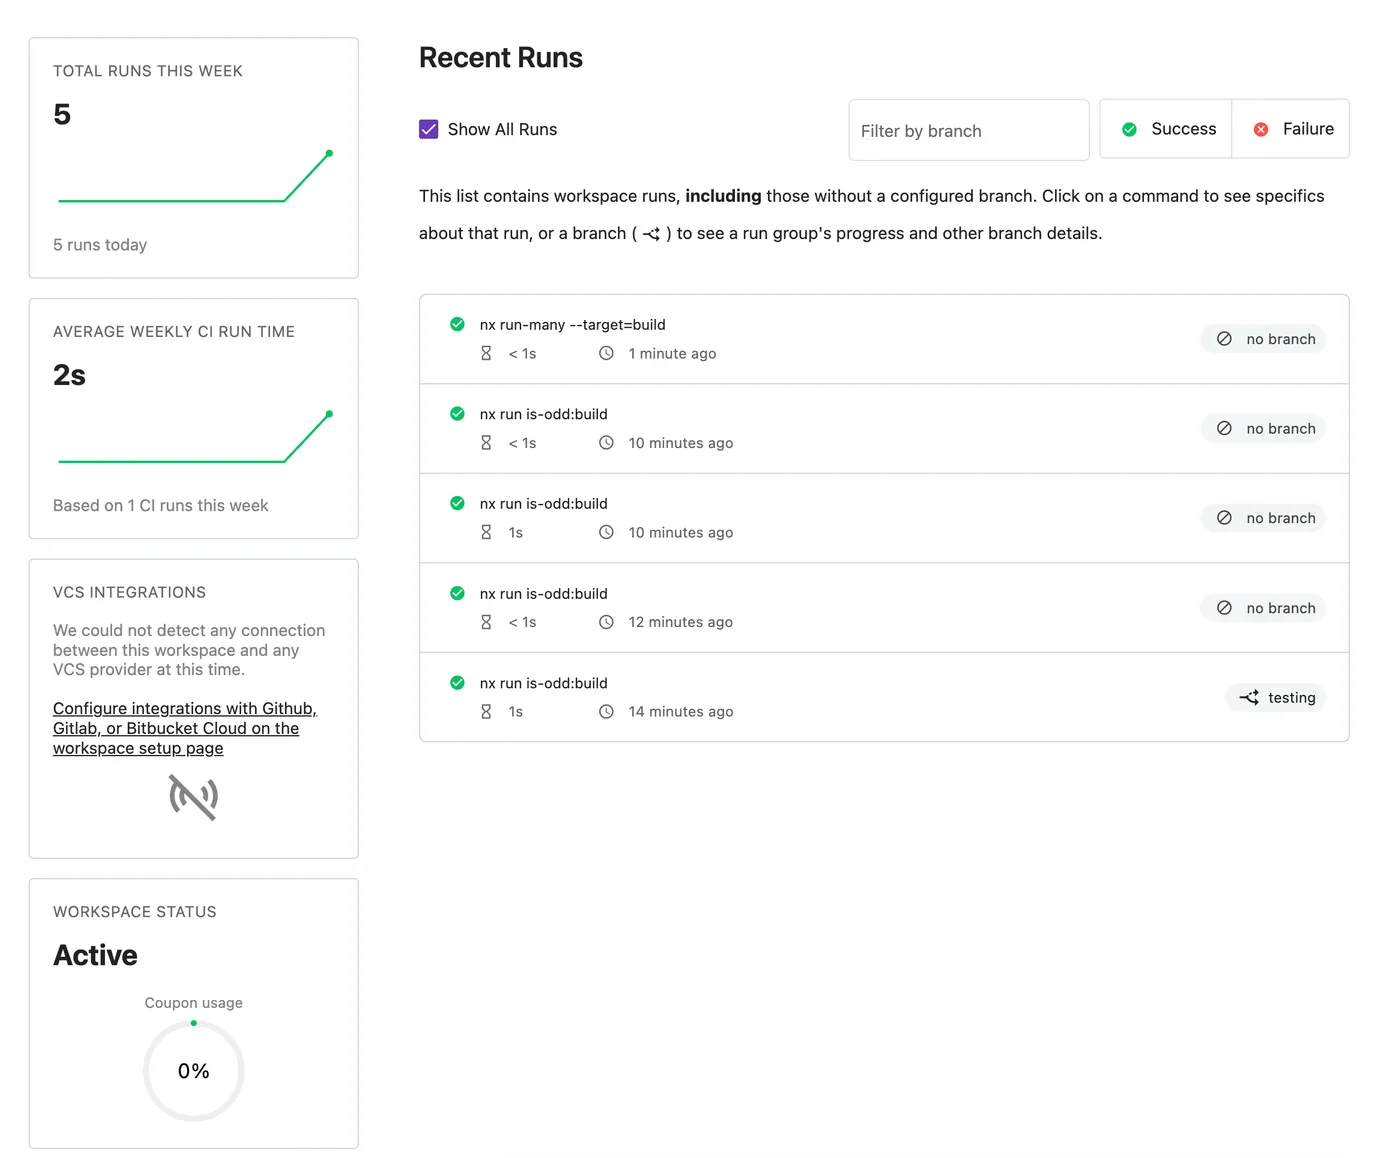
After completing the steps above,
you can see build summaries and details on nx-cloud:
Distributed caching based on nx-cloud is NX’s most impressive feature.
Dependency Analysis
Use the nx graph command to view package dependency relationships in the project:
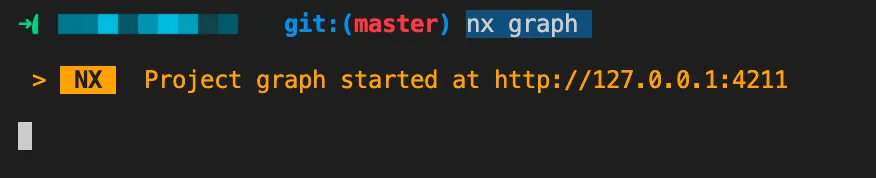
After visiting the URL, you can see the project’s dependency graph:
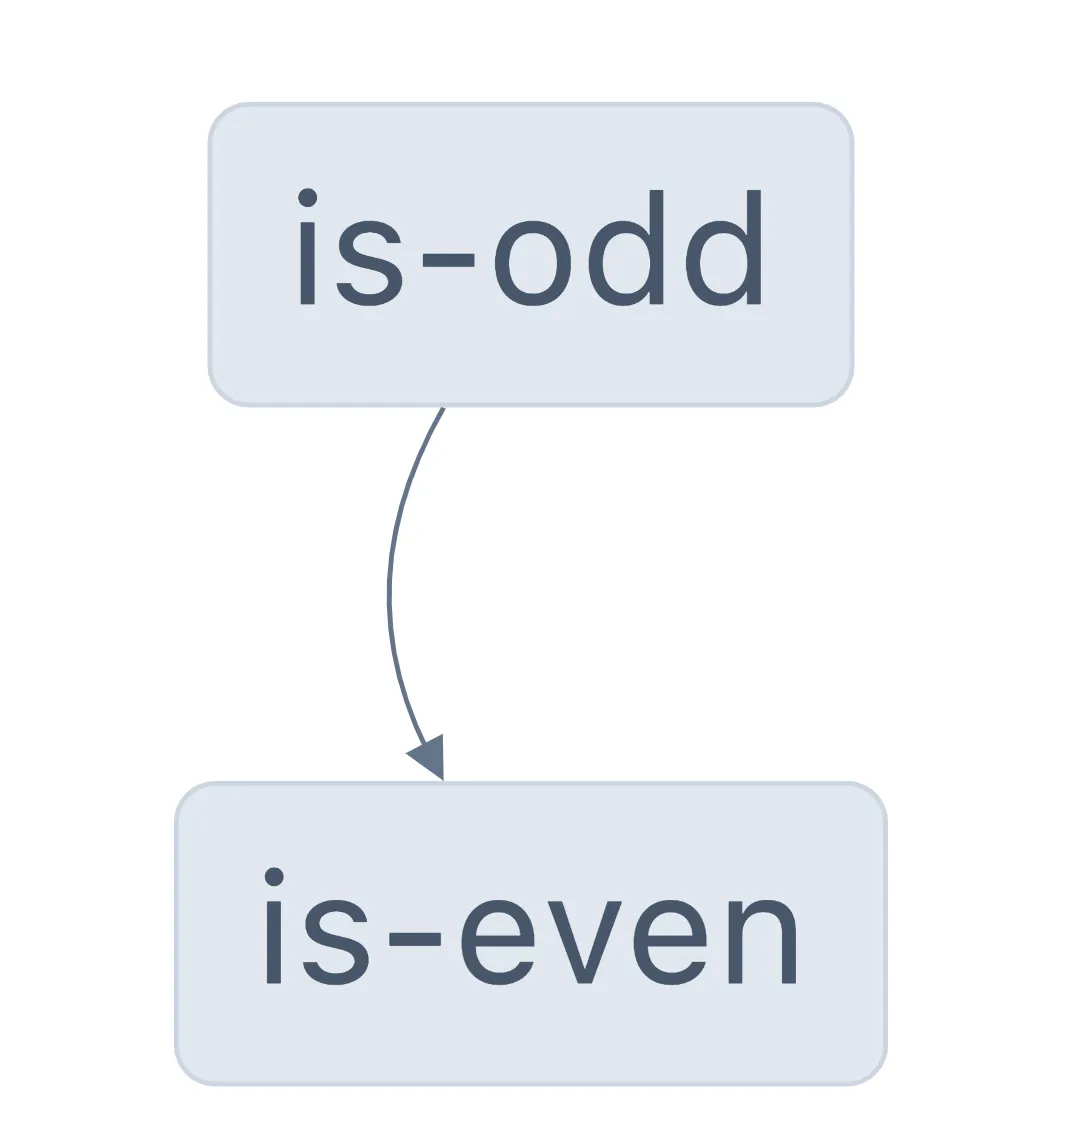
The demo is simple — is-odd depends on is-even.
For complex projects, dependency analysis is a very useful feature.
Package dependency analysis is another NX feature.
More on Caching
One of NX’s most powerful features is caching.
Let’s dive deeper into NX’s caching.
Clear Cache
Use the following command to clear the cache:
nx clear-cache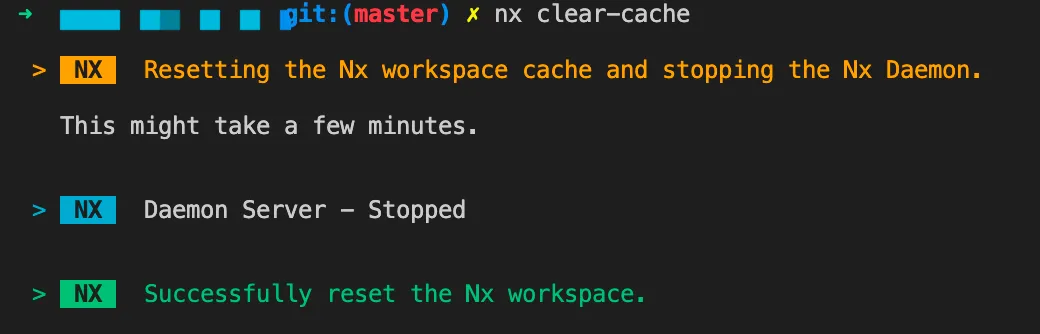
Default Local Cache
If the project was initialized with nx init,
the default generated nx.json looks like this:
{
  "extends": "nx/presets/npm.json",
  "$schema": "./node_modules/nx/schemas/nx-schema.json",
  "tasksRunnerOptions": {
    "default": {
      "runner": "nx/tasks-runners/default",
      "options": {
        "cacheableOperations": ["build"]
      }
    }
  },
  "targetDefaults": {
    "build": {
      "dependsOn": ["^build"]
    }
  }
}
By default, caching is enabled for the build task.
Local build result:
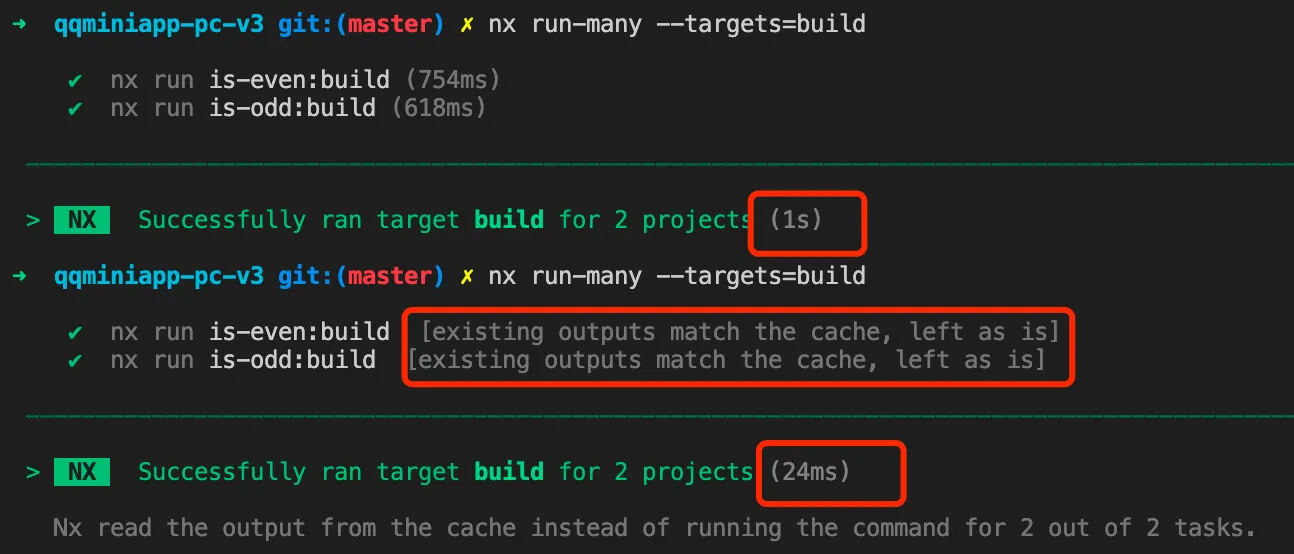
After clearing the cache, the first build takes 1s.
Running it again hits the local cache, taking only 24ms.
Custom Local Cache
If you delete the build output index.js
and run the command again, it will still hit the cache
but won’t generate index.js.
This is because the local cache isn’t customized.
NX checks some default folders like dist by default.
To customize, add a project.json to the package,
or add an nx property to the package’s package.json.
The latter approach:
{
  "name": "is-even",
  "version": "0.0.0",
  "main": "index.js",
  "devDependencies": {},
  "scripts": {
    "build": "rollup -c"
  },
  "nx": {
    "namedInputs": {
      "default": ["{projectRoot}/src/**/*"]
    },
    "targets": {
      "build": {
        "inputs": ["default"],
        "outputs": ["{projectRoot}"],
        "dependsOn": ["^build"]
      }
    },
    "includedScripts": ["build"]
  }
}
The nx config sets the input to the package’s src files
and the output to the package folder.
After configuration, each build checks whether the output folder has cached content.
If not, NX restores the cache from its system to the output folder.
Running the command again:
You can see it indicates a local cache hit.
NX’s local cache is located at node_modules/.cache/nx/
More on custom caching: https://nx.dev/reference/project-configuration#outputs
Distributed Cache
After connecting to nx-cloud as described above,
you can use the powerful distributed cache.
First clear the cache, then run build:

This is equivalent to the team’s first build.
Clear the cache again and run build:
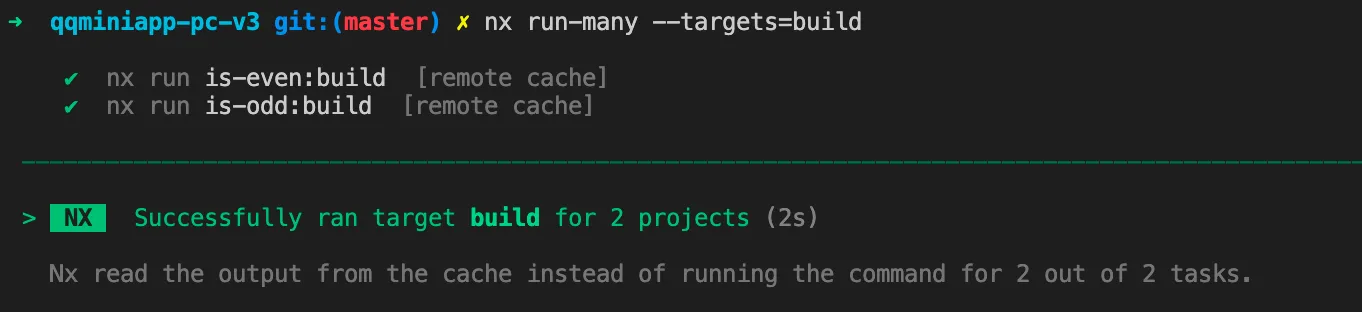
You can see it hit the remote cache.
This simulates the scenario where
one team member completes a build,
and other team members can share the remote cache.
The powerful caching system is NX’s core feature.
More
NX has many more interesting features.
Feel free to explore on your own:
Official site: https://nx.dev/
nx-cloud: https://nx.dev/nx-cloud/intro/what-is-nx-cloud
packages: https://nx.dev/packages