Build a Todolist in One Article
Preface
This article walks through building a todolist,
based on the following tech stack:
React: for UI, https://reactjs.org/
webpack: for building the frontend project, https://webpack.js.org/
localStorage: for data storage, https://developer.mozilla.org/zh-CN/docs/Web/API/Window/localStorage
lerna: for managing the code project, https://lerna.js.org/
pm2: for deploying Node.js services in production, https://pm2.keymetrics.io/
Creating the Project with lerna
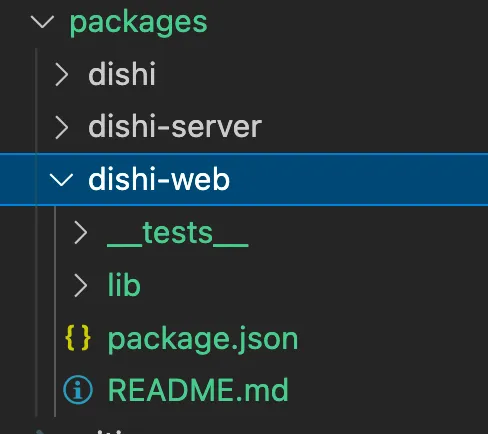
This project involves two sub-projects:
dishi-server: a Node.js server project, simple deployment and redirect to the homepage
dishi-web: the todolist frontend UI project
Both projects are managed with lerna.
For lerna usage, see this article: Learn lerna in One Article
lerna Installation and Initialization
-- Install
npm i -g lerna

-- Initialize in the project directory
lerna init
lerna Create Projects
Use lerna’s create command to create two projects: dishi-server and dishi-web
lerna create dishi-webFollowing the prompts, the corresponding projects are automatically created under the packages folder.
lerna Use Independent Mode
The default generated lerna.json content is as follows
{
  "packages": [
    "packages/*"
  ],
  "version": "0.0.0"
}
In this mode, all projects under packages share a unified version.
This is not very convenient. Change it to independent versioning per project:
{
  "packages": [
    "packages/*"
  ],
  "version": "independent"
}
Set package.json to Private Mode
Since dishi-web and dishi-server are not published as npm packages,
set private to true in package.json.
Otherwise, lerna publish will automatically publish npm packages each time.
{
    "name": "dishi-web",
    "private": true,
    "version": "0.0.0",
    "scripts": {},
    "dependencies": {}
}
lerna publish to Submit the Project
After the above changes, you can git add, git cz to commit locally,
then use lerna’s publish capability to submit the project.
It will automatically tag and push.
lerna publishAfter selecting the version for each project, it will be submitted automatically.
lerna Add Common Commands
Add common lerna commands to the root project’s package.json.
clean: clean dependencies for each project under packages
init: install dependencies for each project under packages. The —hoist flag extracts all project dependencies to the root.
    "scripts": {
        "clean": "lerna clean -y",
        "init": "lerna bootstrap --ignore-prepublish --hoist"
    },
Code above: https://github.com/uikoo9/dishi-monorepo/tree/dishi-web%400.0.2
Developing the Backend Project
The backend project in this tutorial is simple — it just needs to redirect to an HTML page.
Here we use a simple Node.js web framework: https://qiao-z.vincentqiao.com/#/
qiao-z: Installation
npm i qiao-zqiao-z: Controller
qiao-z automatically scans local files ending with Controller.js and registers routes.
Register a GET request. /* means all requests will hit this route.
/**
 * index controller
 */
module.exports = function (app) {
  // index
  app.get('/*', function (req, res) {
    res.render('./views/index.html');
  });
};
qiao-z: Start
The app.js code is as follows
'use strict';

// port
const port = require('./server/config.json').port;

// app
const app = require('qiao-z')();

// listen
app.listen(port);
Start the server
node app.jsAfter starting, you can access http://localhost:9011/ locally. The result looks like this:

Deploy with pm2 in Production
In production, you should not start with node directly. Use pm2 instead. https://pm2.keymetrics.io/
For pm2 usage, see this article: Learn pm2 in One Article
Install pm2
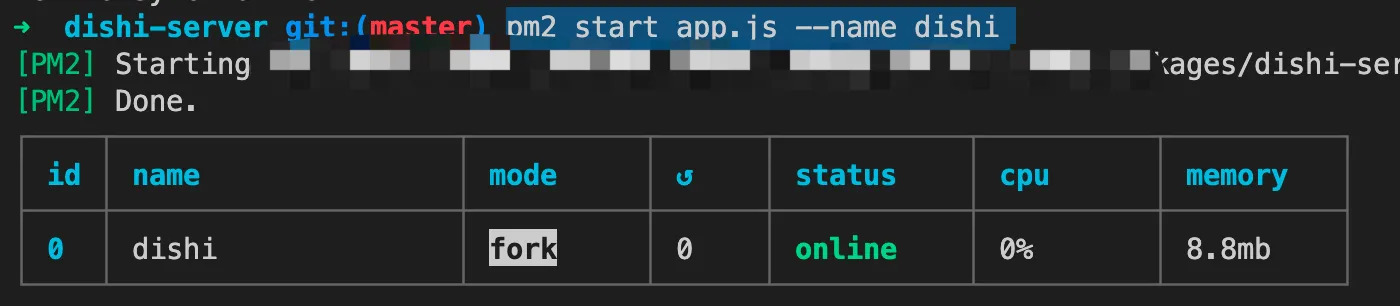
npm i -g pm2Start the service with pm2
pm2 start app.js --name dishiThe result looks like this:
nginx Reverse Proxy and acme HTTPS Certificate
Configure an nginx reverse proxy on your server,
and use acme.sh to obtain HTTPS certificates.
For acme.sh usage, see this article: CentOS Notes 04: Obtaining HTTPS Certificates with acme.sh
Code above: https://github.com/uikoo9/dishi-monorepo/tree/dishi-server%400.0.3
Setting Up the Frontend Project
The frontend project is built with React.
Build tooling uses qiao-webpack, https://qiao-webpack.vincentqiao.com/#/
For webpack usage, see this article: Learn Webpack 5.x in One Article
qiao-webpack: Installation
npm i -D qiao-webpackqiao-webpack: Recommended Configuration
webpack has many configuration options. Here is the recommended config structure:
|--dishi-web
    |--webpack
        |--common
            |--alias.js
            |--entry.js
        |--dev
            |--plugins.js
            |--server.js
        |--prod
            |--output.js
            |--plugins.js
        |--template
            |--mobile.html
            |--pc.html
        |--qiao-webpack.dev.js
        |--qiao-webpack.prod.js
alias.js is the webpack alias configuration, making it easier to import resources and files in code.
'use strict';

// path
const path = require('path');

// alias
module.exports = {
  '@components': path.resolve(__dirname, '../../src/components'),
  '@styles': path.resolve(__dirname, '../../src/styles'),
  '@utils': path.resolve(__dirname, '../../src/utils'),
  '@views': path.resolve(__dirname, '../../src/views'),
};
entry.js is the webpack entry configuration.
'use strict';

// entry
module.exports = {
  // dishi
  'dishi-index-pc': '@views/dishi/dishi-index-pc-view.jsx',
  'dishi-index-mobile': '@views/dishi/dishi-index-mobile-view.jsx',
};
plugins.js configures webpack plugin parameters.
In this article, there are two: CSS minification and HTML generation.
CSS minification uses mini-css-extract-plugin, which is built into qiao-webpack.
    // css
    {
        type: 'css',
        filename: '[name].[contenthash:8].css',
        chunkFilename: '[id].[contenthash:8].css',
        ignoreOrder: true,
    },
HTML generation uses html-webpack-plugin, which is also built into qiao-webpack.
    {
        type: 'html',
        inject: 'body',
        title: 'dishi-index-pc',
        chunks: ['dishi-index-pc'],
        filename: 'dishi-index-pc.html',
        template: pcPath,
    },
server.js under dev is the webpack devServer configuration.
'use strict';

// path
const path = require('path');

// static path
const distPath = path.resolve(__dirname, '../../static');

/**
 * dev server
 */
module.exports = {
  port: 5277,
  static: distPath,
};
output.js under prod is the webpack output configuration.
This outputs HTML to the dishi-server/views folder and static files to the dishi-server/static folder.
'use strict';

// path
const path = require('path');

// static path
const distPath = path.resolve(__dirname, '../../../dishi-server/static');

// output
module.exports = {
  filename: '[name].[contenthash:8].js',
  path: distPath,
  clean: true,
};
template/ contains two HTML templates.
qiao-webpack: Build
Add two scripts
"dev": "qwebpack dev ./webpack/qiao-webpack.dev.js",
"build": "qwebpack build ./webpack/qiao-webpack.prod.js",
Run the build command. The result looks like this:
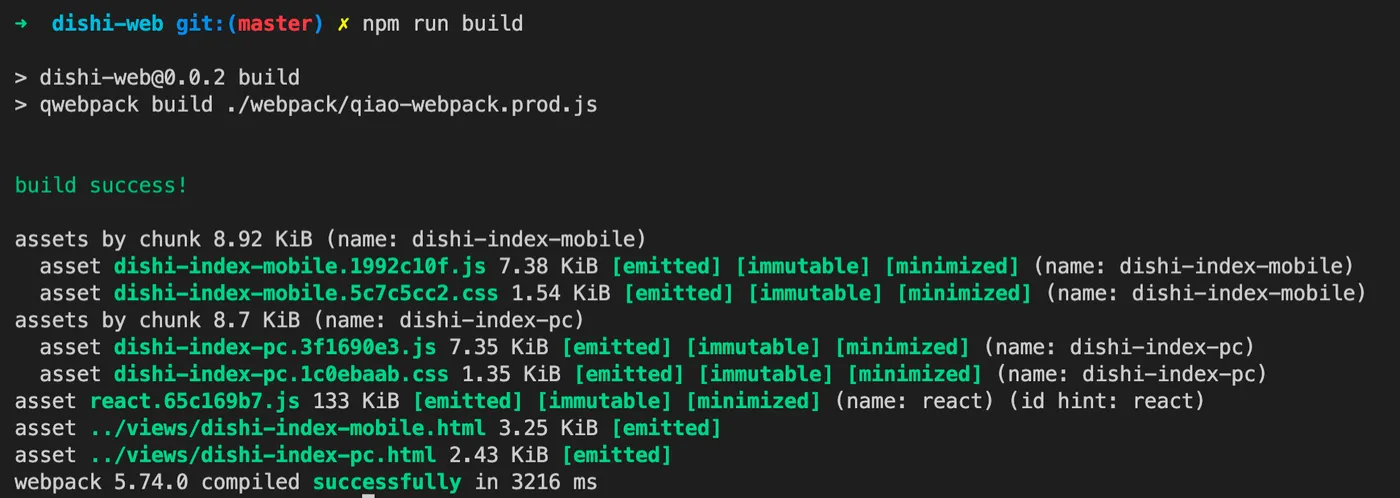
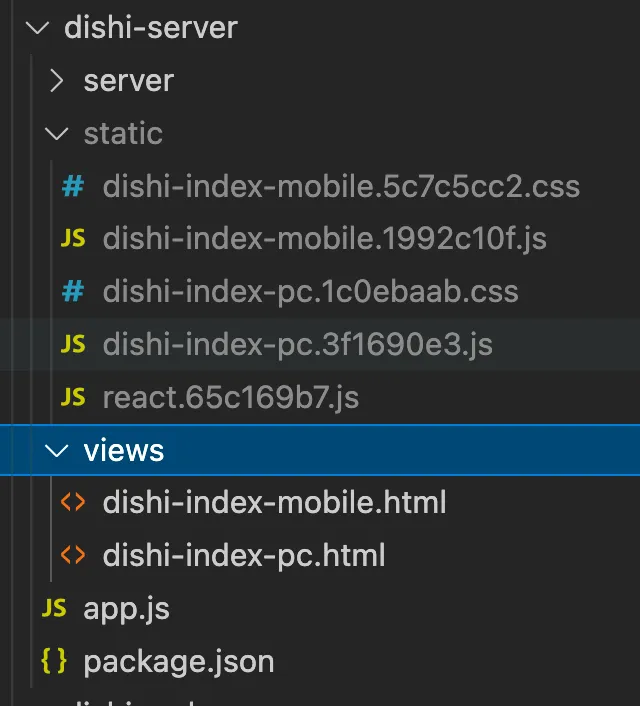
The corresponding HTML and static files are generated under dishi-server.
This way, dishi-server can access the built HTML and static files.
The benefit of this approach is:
The frontend project dishi-web is for frontend development. Debugging can use webpack dev locally.
The backend project dishi-server is for backend development. It directly uses the HTML and static files built by the frontend.
qiao-cos: Installation
As described above, you can now deploy dishi-server directly to the server.
However, it is recommended not to deploy static files (CSS, JS, etc.) directly to the application server, to avoid bandwidth pressure.
It is better to upload static files to a file server, such as Tencent Cloud COS or Alibaba Cloud OSS.
Here we use Tencent Cloud COS, with a tool called qiao-cos: https://code.insistime.com/#/qiao-cos-cli
npm i -D qiao-cosqiao-cos: Upload
Add a script to the dishi-web project
"upload": "qcos fo ./config.json ../dishi-server/static 21_dishi_ls/static"Run the upload command. The result looks like this:
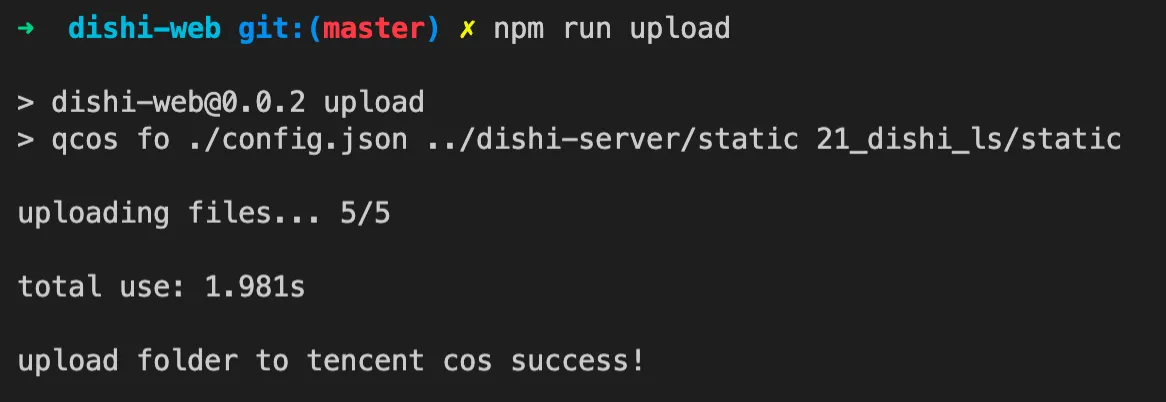
After deploying the corresponding HTML files (dishi-server), the access result looks like this:
Code above: https://github.com/uikoo9/dishi-monorepo/tree/dishi-web%400.0.3
Developing the Frontend Project
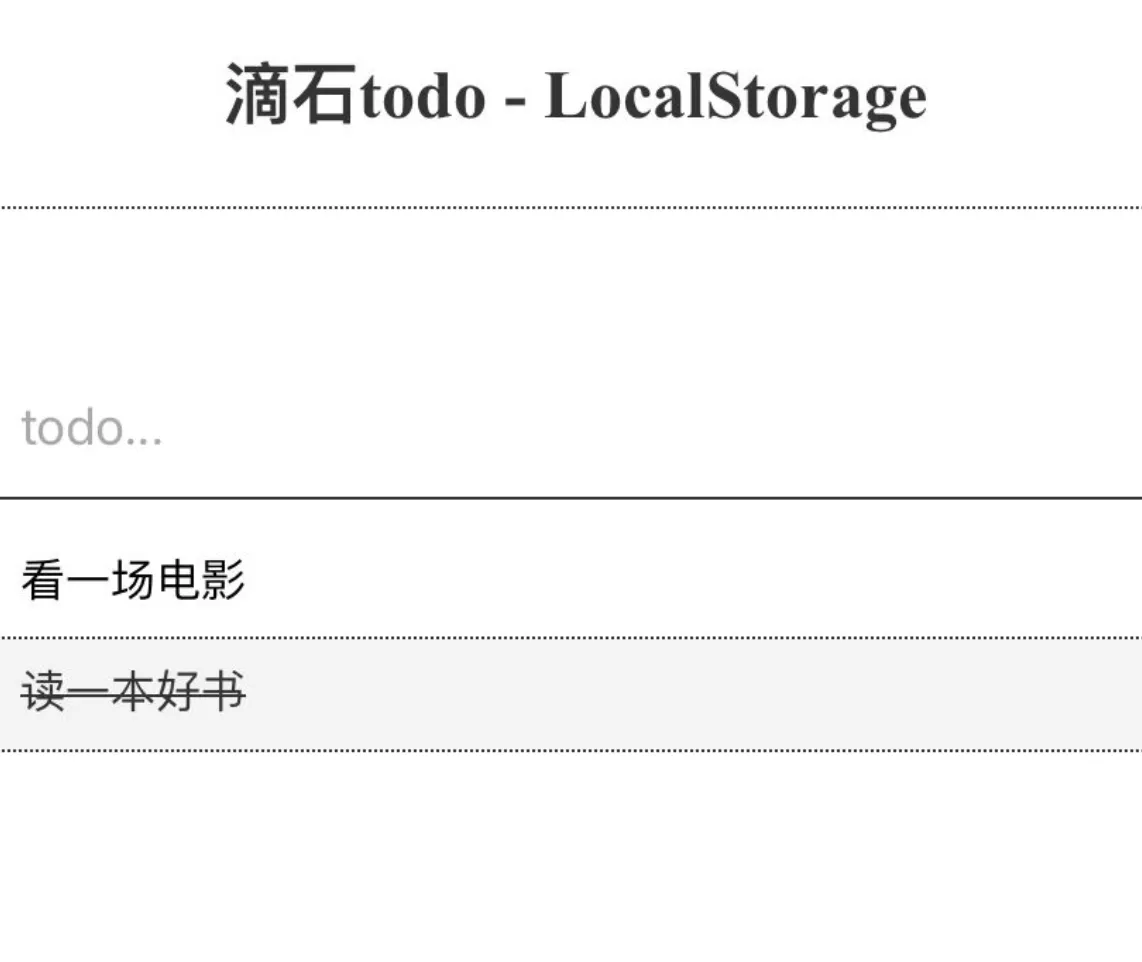
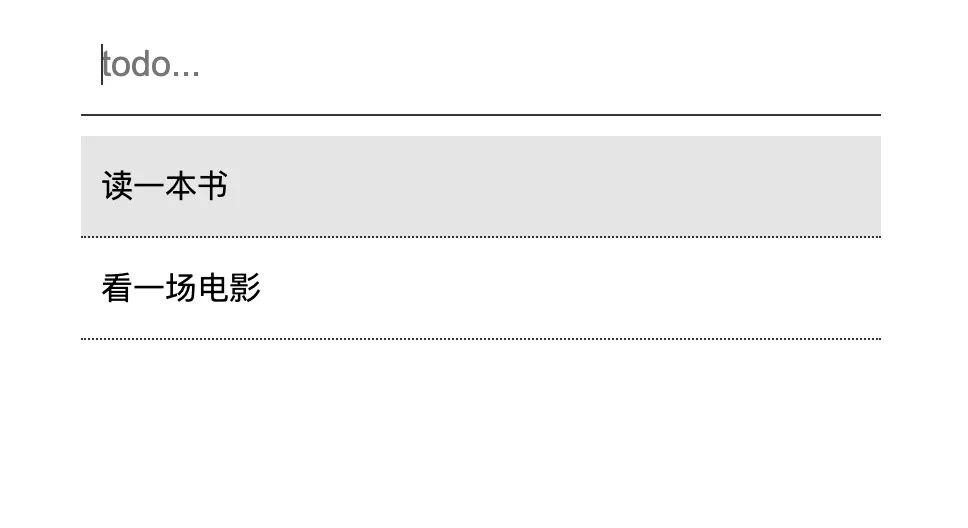
Final Result
-
Type content in the input and press Enter to add a todo
-
The todolist is displayed below the input
-
Click on a todo to complete and remove it
Data Structure
Each todo has the following data structure, where key is a timestamp
{
    key: 1665400441283,
    value: '读一本书'
}
The todo list data structure is an array:
[
  {
    key: 1665400441283,
    value: '读一本书',
  },
];
qiao.ls.js: Saving Data
Data is stored using localStorage.
For details, see this article: Learn localStorage in One Article
Here we use qiao.ls.js for operations: https://code.insistime.com/#/qiao.ls.js
Since saving directly by key-value pairs would be scattered in localStorage,
we aggregate them under the namespace “todos”. The final result looks like this:

The code for adding, deleting, and getting todos is as follows
// qiao
import { ls, cache } from 'qiao.ls.js';

/**
 * add todo
 * @param {*} todo
 */
export const addTodo = (key, todo) => {
  cache('todos', key, todo);
};

/**
 * del todo
 * @param {*} key
 */
export const delTodo = (key) => {
  cache('todos', key, null);
};

/**
 * get todos
 * @returns
 */
export const getTodos = () => {
  // check
  const todos = ls('todos');
  if (!todos) return [];

  // res
  const res = [];
  for (const [key, value] of Object.entries(todos)) {
    res.push({
      key: key,
      value: value,
    });
  }

  return res;
};
Implementing the Todo Input
-
Save on Enter key press
-
First clear the input
-
Add the todo to localStorage
-
Refresh the todo list
<Input
  type="text"
  placeholder={'todo...'}
  value={todo}
  onChange={(e) => setTodo(e.target.value)}
  onKeyPress={(e) => {
    if (e.nativeEvent.keyCode === 13) {
      setTodo('');

      addTodo(Date.now(), todo);

      setTodos(getTodos());
    }
  }}
/>
Implementing the Todo List
-
Iterate over todos and display each one
-
On click, delete the todo from localStorage
-
Refresh the todo list
{
  todos &&
    todos.map((item) => {
      return (
        <div
          className="dishi-item"
          key={item.key}
          onClick={() => {
            delTodo(item.key);

            setTodos(getTodos());
          }}
        >
          {item.value}
        </div>
      );
    });
}
Code above: https://github.com/uikoo9/dishi-monorepo/tree/dishi-web%400.0.8
Summary
The above implements a todo list based on localStorage for local data storage.
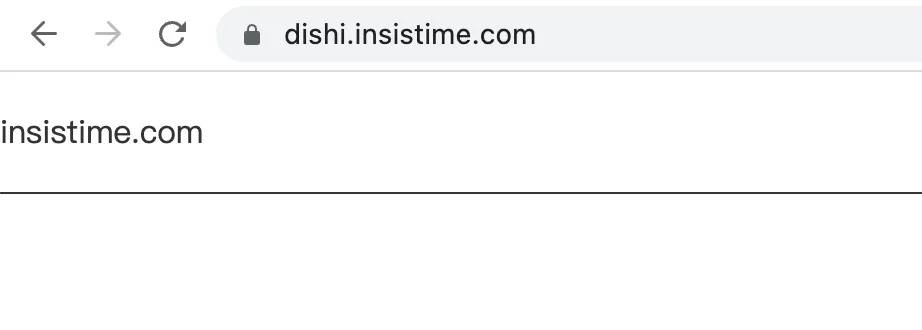
Final result URL: https://insistime.com/dishi-ls
Final code: https://github.com/uikoo9/dishi-monorepo/tree/localstorage
1.Use lerna to manage the project, Learn lerna in One Article
2.Use qiao-z to develop the Node.js server code, https://qiao-z.vincentqiao.com/#/
3.Use pm2 to deploy the Node.js server code, What You Don’t Know About pm2
4.Use React to develop the frontend project, https://reactjs.org/
5.Use webpack to build the frontend project, Learn Webpack 5.x in One Article
6.Use qiao-webpack to quickly build the frontend project, https://qiao-webpack.vincentqiao.com/#/
7.Use Tencent Cloud COS to host static files, https://code.insistime.com/#/qiao-cos-cli
8.Use localStorage to save local data, Learn localStorage in One Article
9.Use qiao.ls.js to operate localStorage data, https://code.insistime.com/#/qiao.ls.js