一篇文章学会Webpack5.x
【前言】
Web前端构建离不开webpack,
众所周知webpack的配置很多很复杂,
甚至可以设置“webpack配置工程师”,
本文抓住webpack核心概念,
和业务开发中常用配置进行讲解,
争取一篇文章学会webpack使用和配置。
【常用文档】
webpack手册:可以按文档一步一步学习
webpack概念: webpack常用的概念
webpack配置: 查询webpack的配置项
【讲解模式】
由于要快速上手webpack,所以不和其他文章一样从概念讲起,
而是直接从实战代码讲起,实战代码: https://github.com/insistime/webpack-guides ,
可以直接clone到本地,
git clone git@github.com:insistime/webpack-guides.git ./webpack-guides操作过程如下
1.checkout到对应的tag,例如0.0.4这个tag
git checkout 0.0.42.安装依赖,不同代码依赖不同
npm i3.对照代码看讲解
4.自己练习
【安装】
webpack是构建工具,
所以安装的时候,做为devDependencies安装即可
npm i -D webpack webpack-cli安装完后的效果
  "devDependencies": {
    "webpack": "^5.59.0",
    "webpack-cli": "^4.9.1"
  },
代码见: https://github.com/insistime/webpack-guides/tree/0.0.4
【entry和output】
entry:入口,可以配置单个或者多个入口
output:输出,配置输出的文件名,位置等
这里的例子,
entry为src文件夹下的index.js文件,
输出到dist文件夹下的main.js文件
const path = require('path');

module.exports = {
  entry: './src/index.js',
  output: {
    filename: 'main.js',
    path: path.resolve(__dirname, 'dist'),
  },
};
代码见: https://github.com/insistime/webpack-guides/tree/0.0.4
【配置文件】
webpack使用一般都依赖webpack配置文件,
这里新建一个webpack.config.js文件,
内容如上entry和output示例
代码见: https://github.com/insistime/webpack-guides/tree/0.0.4
【构建脚本】
安装完webpack,准备好配置文件后如何构建呢,
需要在package.json内配置一个脚本,如下
  "scripts": {
    "build": "webpack --config webpack.config.js"
  },
然后执行
npm run build效果如下
代码见: https://github.com/insistime/webpack-guides/tree/0.0.4
【测试效果】
这里手动创建一个html,测试效果,可以直接双击打开
<!DOCTYPE html>
<html>
  <head>
    <meta charset="utf-8" />
    <title>Getting Started</title>
  </head>
  <body>
    <script src="main.js"></script>
  </body>
</html>
打开后效果

代码见: https://github.com/insistime/webpack-guides/tree/0.0.4
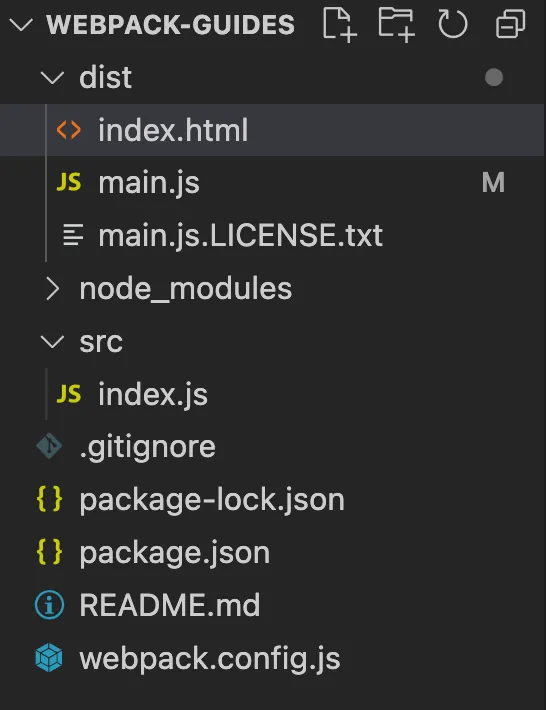
【小结】
到这里,学习了
1.webpack-安装
2.webpack-配置文件
3.webpack-构建
4.webpack-entry
5.webpack-output
代码见: https://github.com/insistime/webpack-guides/tree/0.0.4
文件结构如下
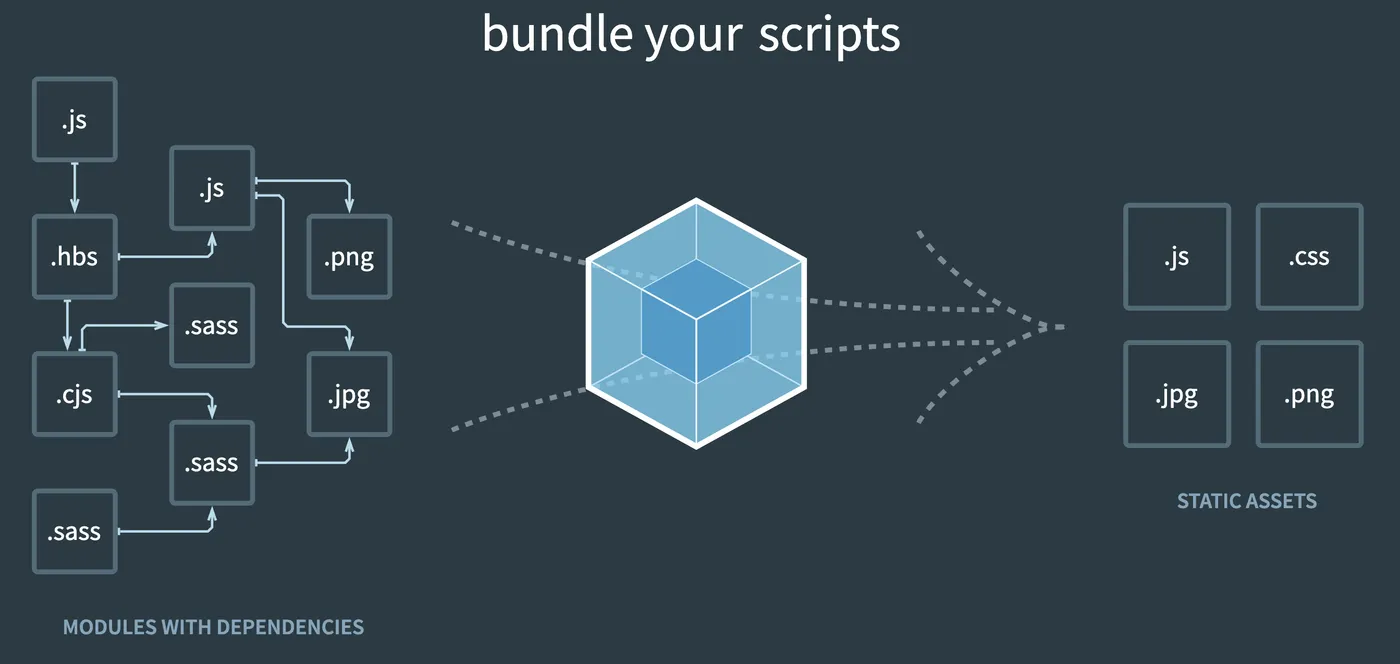
【module】
webpack的理念是所有web前端开发过程中使用到的资源都是模块(module),
所以可以通过webpack的配置,
在web前端代码内加载和使用几乎任何资源,
例如这里,js内引入了css,png,xml等资源
import _ from 'lodash';
import './style.css';
import Icon from './icon.png';

import Data from './data.xml';
import Notes from './data.csv';

import toml from './data.toml';
import yaml from './data.yaml';
import json from './data.json5';

console.log(toml.title); // output `TOML Example`
console.log(toml.owner.name); // output `Tom Preston-Werner`

console.log(yaml.title); // output `YAML Example`
console.log(yaml.owner.name); // output `Tom Preston-Werner`

console.log(json.title); // output `JSON5 Example`
console.log(json.owner.name); // output `Tom Preston-Werner`

function component() {
  const element = document.createElement('div');

  // Lodash, now imported by this script
  element.innerHTML = _.join(['Hello', 'webpack'], ' ');
  element.classList.add('hello');

  // Add the image to our existing div.
  const myIcon = new Image();
  myIcon.src = Icon;

  element.appendChild(myIcon);

  console.log(Data);
  console.log(Notes);

  return element;
}

document.body.appendChild(component());
代码见: https://github.com/insistime/webpack-guides/tree/0.0.9
【loader】
而加载资源,大部分需要通过loader进行加载,
例如加载css文件需要style-loader和css-loader,
      {
        test: /\.css$/i,
        use: ['style-loader', 'css-loader'],
      },
而loader都不是webpack内置的,
所以这里使用之前需要先安装对应的loader
npm i -D style-loader css-loader这里只是一个开头,
后续你会发现使用webpack需要安装很多依赖
代码见: https://github.com/insistime/webpack-guides/tree/0.0.9
【asset】
webpack也发现了依赖多的这个问题,
将一些最常见的依赖内置到了webpack中,
在webpack5.x中,内置了一些loader,
例如之前的file-loader,url-loader,raw-loader,
在webpack5.x内对应:asset/resource,asset/inline,assets/source,
所以在webpack5.x下,图片和字体的配置方式如下
      {
        test: /\.(png|svg|jpg|jpeg|gif)$/i,
        type: 'asset/resource',
      },
      {
        test: /\.(woff|woff2|eot|ttf|otf)$/i,
        type: 'asset/resource',
      },
代码见: https://github.com/insistime/webpack-guides/tree/0.0.9
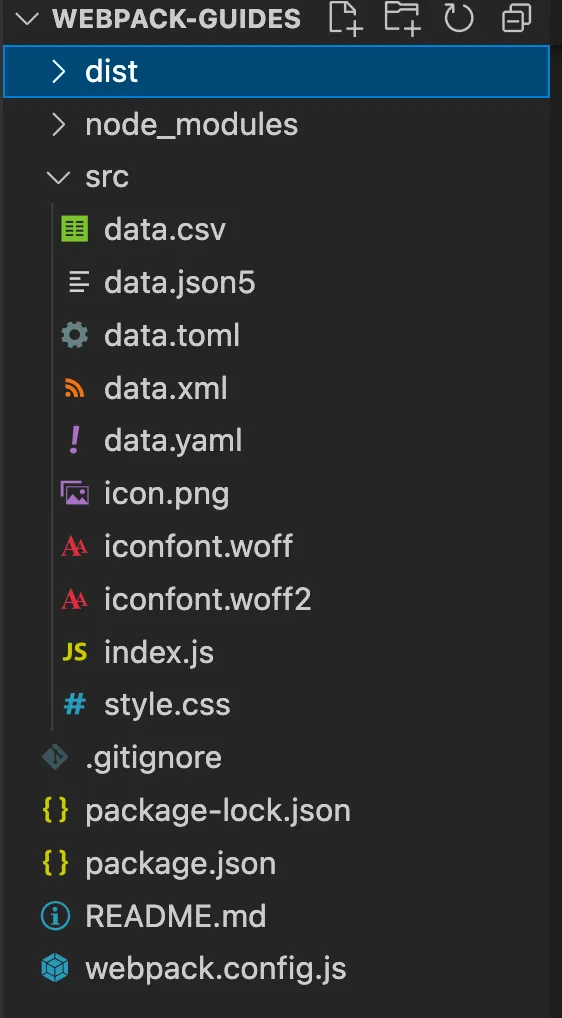
【小结】
到这里,学习了
1.webpack-module
2.webpack-loader
3.webpack-asset
代码见: https://github.com/insistime/webpack-guides/tree/0.0.9
文件结构如下
【plugin】
在上述第一个小结内,html文件是手动生成的,
这个过程比较麻烦,
webpack的plugin机制很好的解决了这个问题,
这里要讲到的plugin:html-webpack-plugin,
没错,在使用之前,你依然需要安装它
npm i -D html-webpack-plugin然后配置
const path = require('path');
const HtmlWebpackPlugin = require('html-webpack-plugin');

module.exports = {
  entry: {
    index: './src/index.js',
    print: './src/print.js',
  },
  plugins: [
    new HtmlWebpackPlugin({
      title: 'Output Management',
    }),
  ],
  output: {
    filename: '[name].bundle.js',
    path: path.resolve(__dirname, 'dist'),
    clean: true,
  },
};
构建后,你会发现dist文件夹中自动生成了html文件,
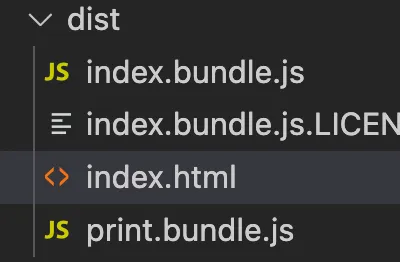
这里简单对比一下loader和plugin
loader:为webpack加载资源的工具,
plugin:为拓展webpack能力的工具,
这些能力一般都是非核心能力
代码见: https://github.com/insistime/webpack-guides/tree/0.1.3
【再看entry和output】
你会发现上述的例子生成了两个js文件,
并且js文件名字也做了修改,
这里依赖entry的改动,如下
  entry: {
    index: './src/index.js',
    print: './src/print.js',
  },
和output的改动,如下
  output: {
    filename: '[name].bundle.js',
    path: path.resolve(__dirname, 'dist'),
    clean: true,
  },
可以看到entry变为了两个入口,
output的filename使用了[name]代表原文件名,
output添加了clean属性,代码每次构建前清理dist文件夹
代码见: https://github.com/insistime/webpack-guides/tree/0.1.3
【小结】
到这里,学习了
1.webpack-plugin
2.webpack-entry,多个入口
3.webpack-output,[name]
4.webpack-output,clean
代码见: https://github.com/insistime/webpack-guides/tree/0.1.3
【mode】
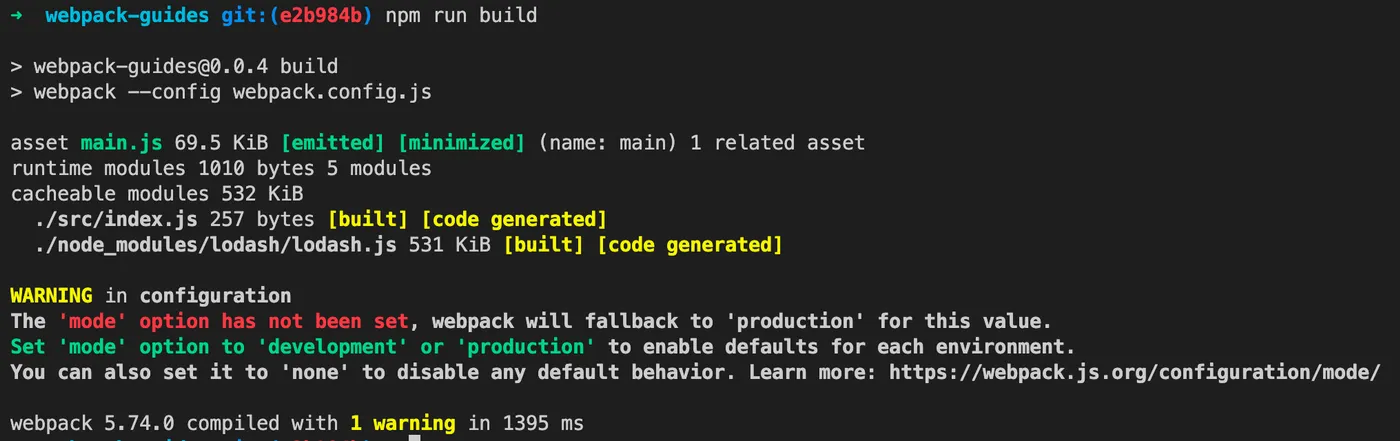
上述代码构建虽然没什么问题,
但是总有一些提示,如下

这个提示也很明确,没有设置mode,
webpack的mode就是告诉webpack应该使用哪种模式,
比如development或者production,详见: https://webpack.js.org/configuration/mode/#mode-development
不同点大概是是否压缩,构建到内存还是构建到文件等
这里设置一个mode,如下
mode: 'development',再次构建,可以看到已经没有上述提示了
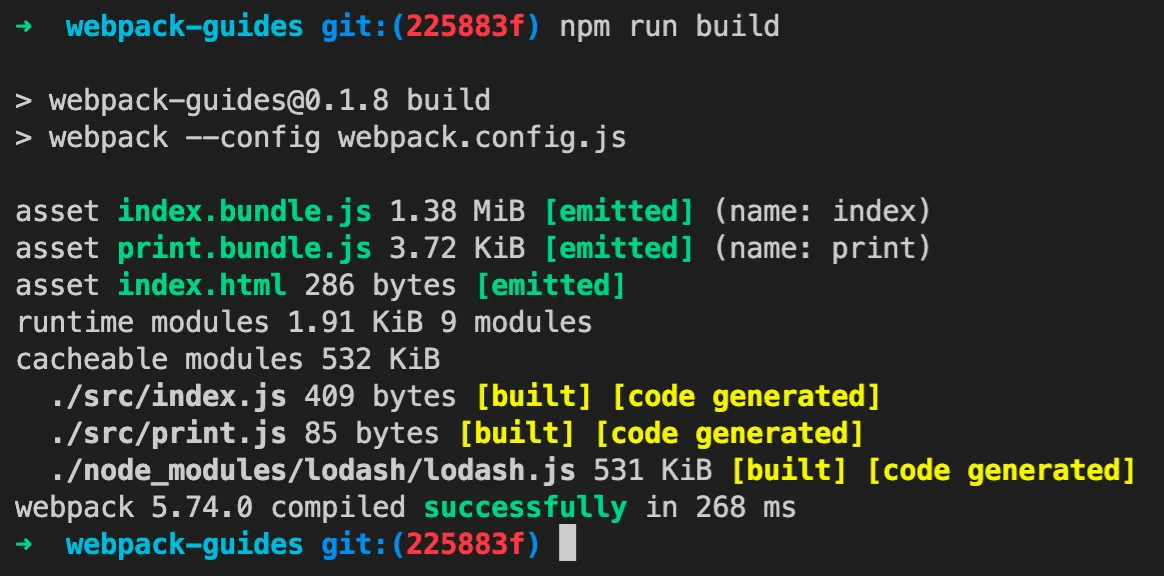
代码见: https://github.com/insistime/webpack-guides/tree/0.1.8
【watch】
webpack本身自带watch功能,不需要额外安装依赖,
添加watch脚本
"watch": "webpack --config webpack.config.js --watch"执行watch脚本

修改src下的文件,发现webpack会自动重新构建
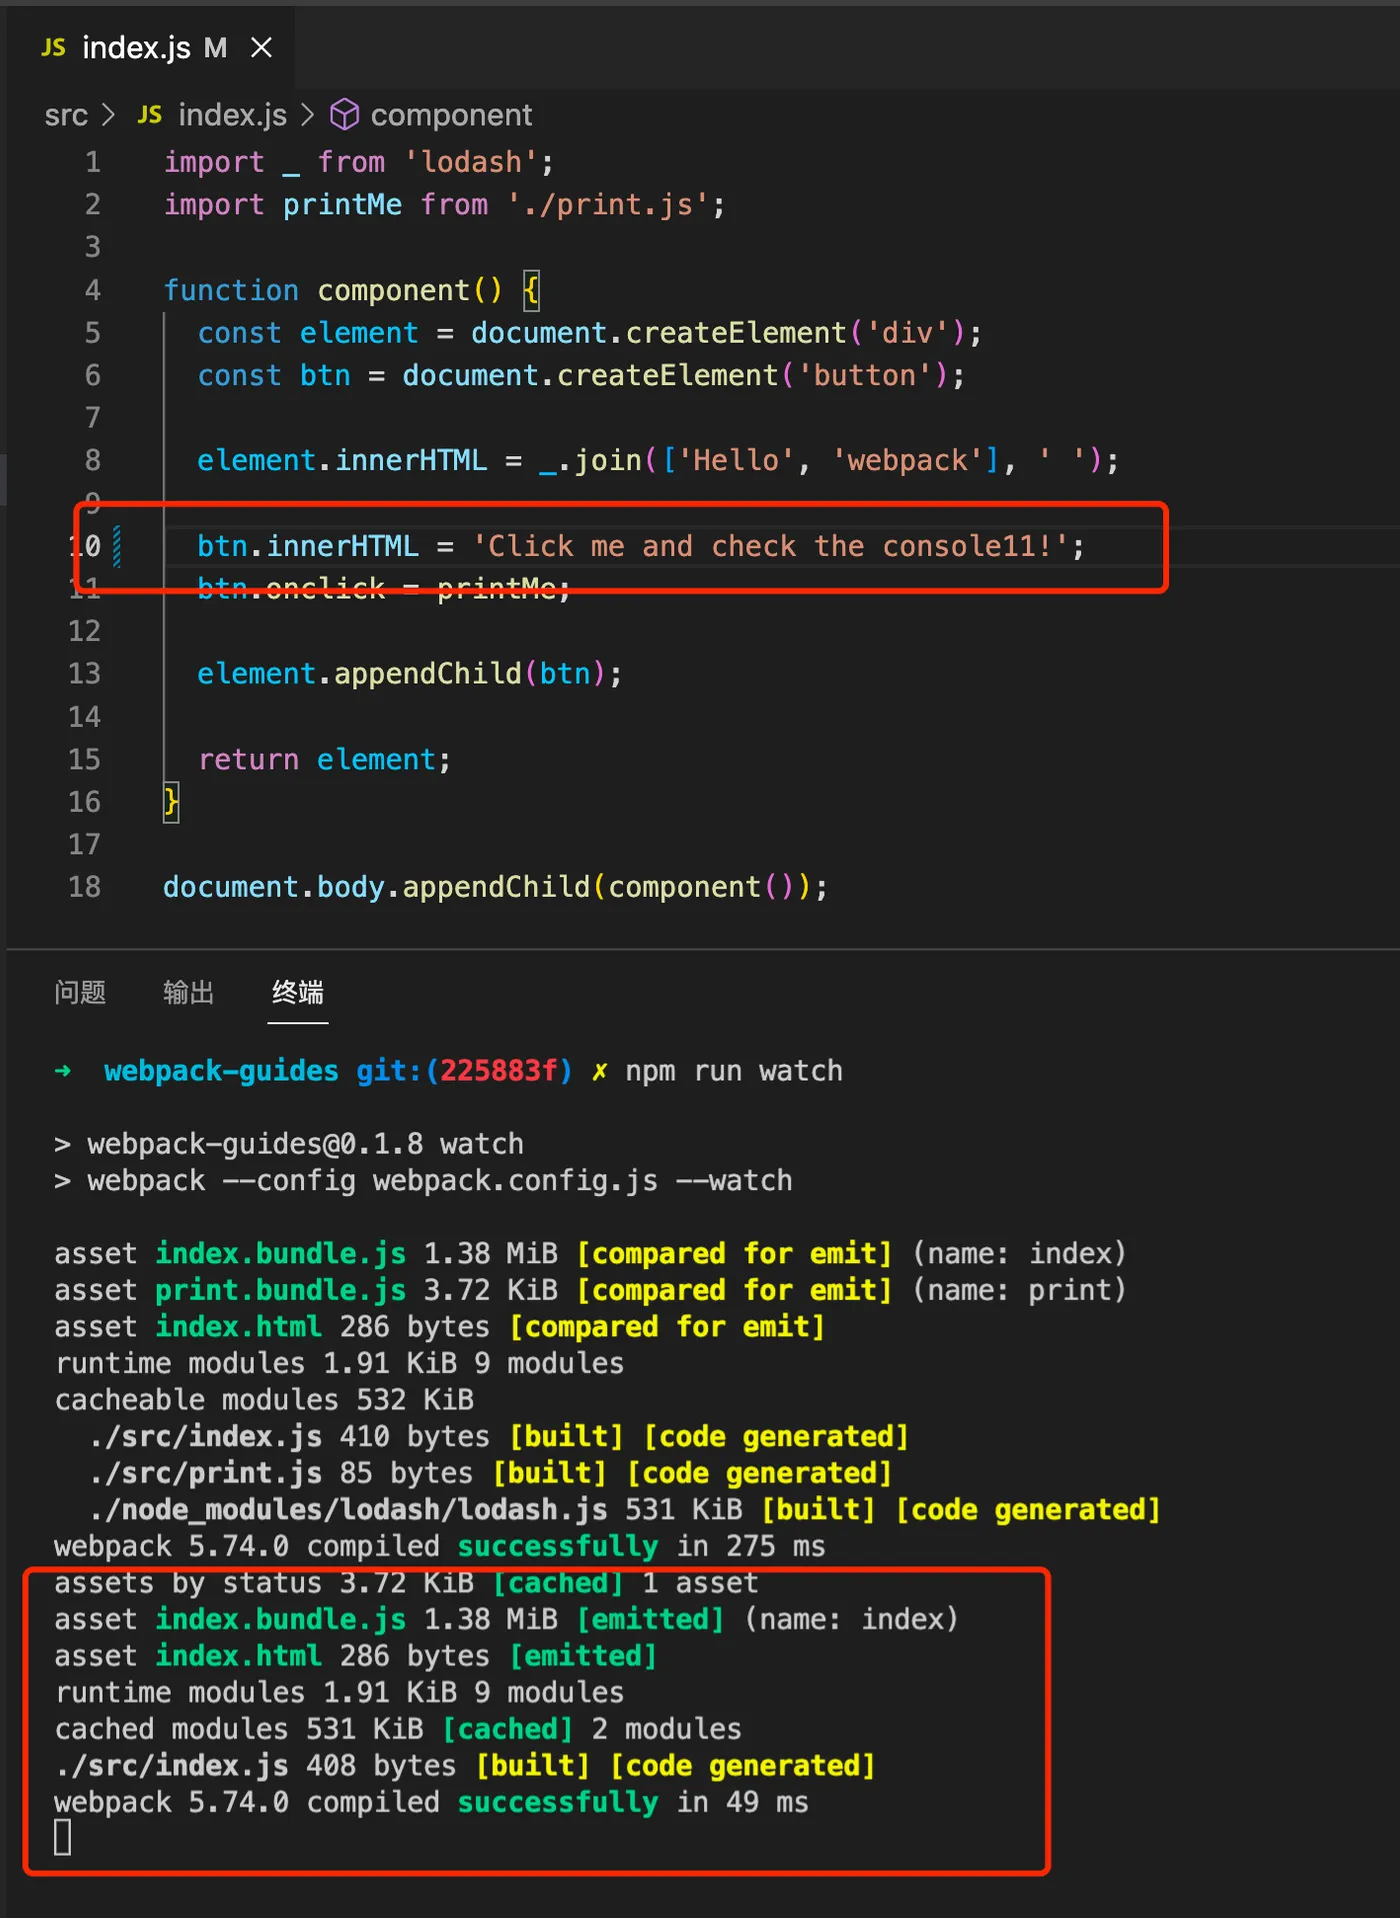
所以watch的能力是监听文件变动,并自动构建
代码见: https://github.com/insistime/webpack-guides/tree/0.1.8
【watch实践】
到这里会发现一个问题,之前打开html文件都是手动双击打开,
也就是预览html效果是通过file协议直接浏览器打开的,
而不是http服务器的模式打开,
实践中需要一个server跑起来html文件,
这里暂时使用pm2代替,
pm2的使用可以看这篇文章:一篇文章学会pm2
安装pm2
npm i -g pm2运行html文件
cd dist
pm2 serve .
pm2会运行一个server,内容是dist文件夹下的内容

可以看到使用的8080端口,
这样本地可以通过8080端口访问了

到这里watch的实践如下
1.npm run watch
2.pm2运行dist文件夹
3.访问8080端口查看效果
4.修改src下文件
5.刷新页面看效果
代码见: https://github.com/insistime/webpack-guides/tree/0.1.8
【devServer】
那使用webpack,还需要配一个pm2吗,
其实,webpack已经为你提供了一个开发时使用的server了
安装依赖
npm i -D webpack-dev-server添加配置
  devServer: {
    static: './dist',
  },
添加脚本
"start": "webpack serve --open",运行devServer
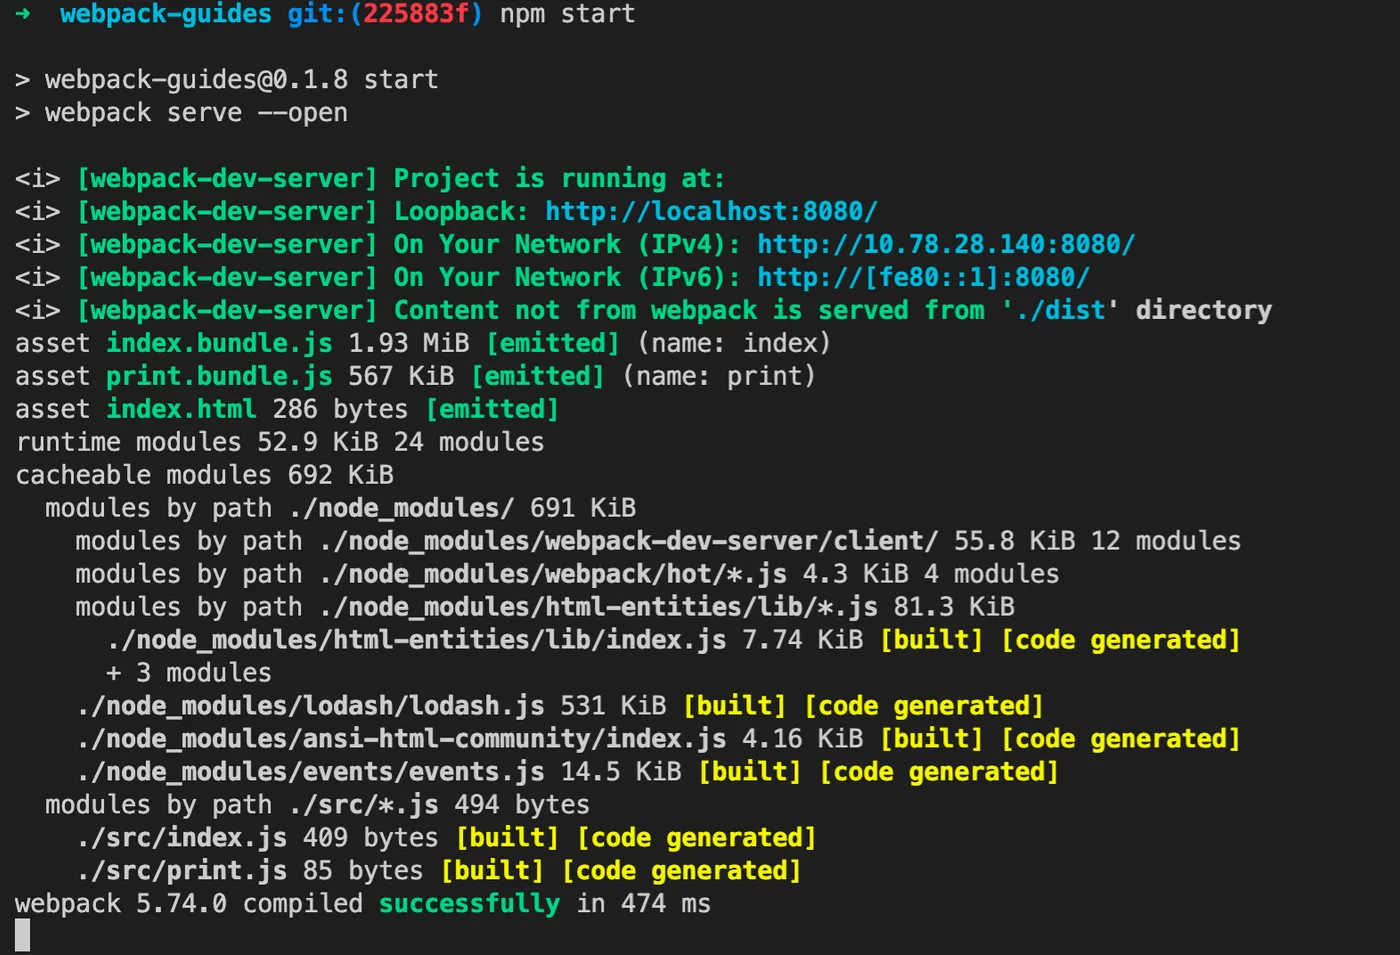
webpack-dev-server做了哪些事情呢
1.构建文件
2.启动一个server,运行dist下文件
3.打开浏览器
4.监听文件变化
相当于webpack-dev-server是watch+pm2的合集,
详见: https://www.npmjs.com/package/webpack-dev-server
到这里开发实践修改为
1.npm run start
2.访问8080查看效果
3.修改src下文件
4.刷新页面查看效果
代码见: https://github.com/insistime/webpack-guides/tree/0.1.8
【小结】
到这里,学习了
1.webpack-mode
2.webpack-watch
3.webpack-devServer
代码见: https://github.com/insistime/webpack-guides/tree/0.1.8
【code splitting】
如果有两个js文件都引入了一个公共的js库,例如lodash,

目前的代码构建后的效果如下

发现两个文件都很大,因为两个文件都包含了lodash这个js库
代码见: https://github.com/insistime/webpack-guides/tree/0.1.9
如何提取这个公共的js库呢,修改配置
  optimization: {
    splitChunks: {
      chunks: 'all',
    },
  },
再次执行,发现已经将lodash抽取出来了

代码见: https://github.com/insistime/webpack-guides/tree/0.2.0
【小结】
到这里,学习了
1.webpack-code splitting
代码见: https://github.com/insistime/webpack-guides/tree/0.2.0
【基础总结】
后续webpack还有一些概念,
比如caching,tree shaking,production等等,
但这些都是调优部分的能力,目前基础使用已经ok了,
在做下总结,学习了
1.webpack-安装
2.webpack-配置文件
3.webpack-构建
4.webpack-entry
5.webpack-output
6.webpack-module
7.webpack-loader
8.webpack-asset
9.webpack-plugin
10.webpack-mode
11.webpack-watch
12.webpack-devServer
13.webpack-code splitting
【react】
webpack基础学习完毕,后续基本两个方向
1.对生产环境的webpack配置进行优化
2.开发实践中使用webpack,比如react的项目如何使用webpack
这里准备一个简单的react代码,用来演示
const React = require('react');
const ReactDOM = require('react-dom');

ReactDOM.render(<h1>Helloo, world!</h1>, document.getElementById('root'));
安装依赖
-- react
npm i react react-dom

-- babel
npm i -D babel-loader @babel/core @babel/preset-react
修改配置
  module: {
    rules: [
      {
        test: /\.(js|jsx)$/,
        exclude: /node_modules/,
        loader: 'babel-loader',
        options: { presets: ["@babel/preset-react"] }
      },
    ],
  },
构建成功

代码见: https://github.com/insistime/webpack-guides/tree/1.0.3
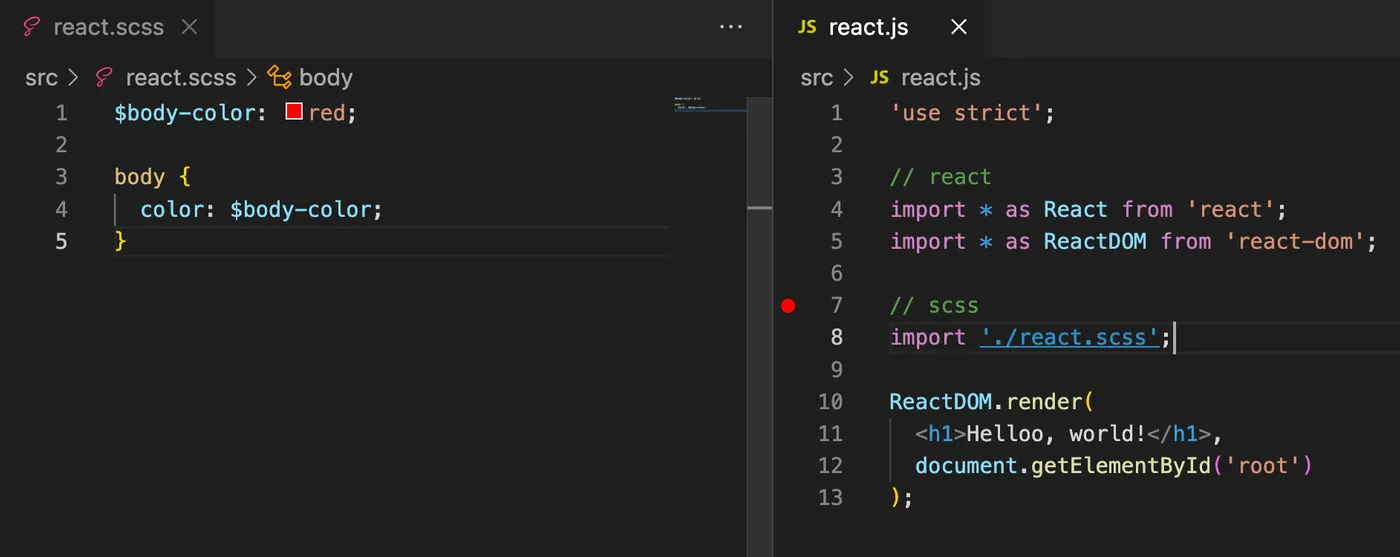
【sass】
除了react,一些css框架的使用也必不可少,
这里用sass为例,演示在webpack内如何配置,
代码多引入了一个scss文件,如下
安装依赖
npm i -D sass sass-loader css-loader style-loader修改配置
      {
        test: /\.scss$/i,
        use: [
          "style-loader",
          "css-loader",
          "sass-loader",
        ],
      },
构建成功
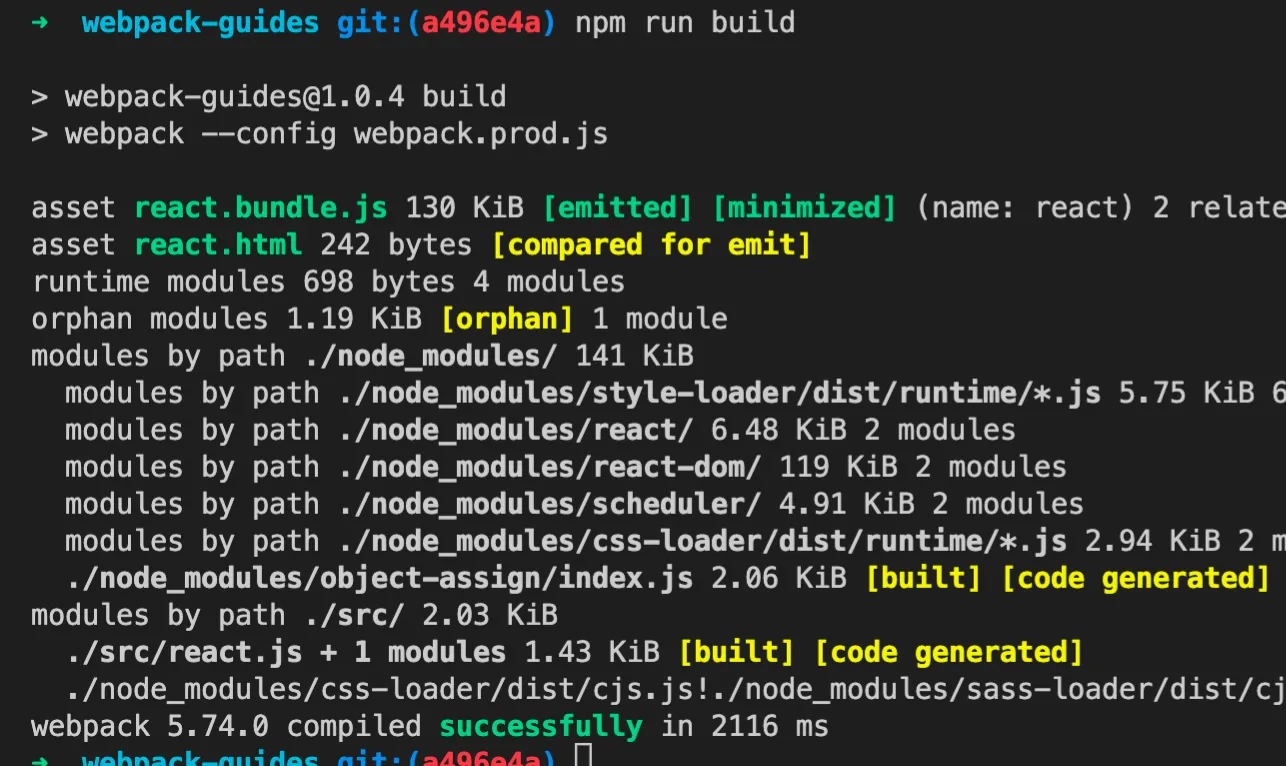
代码见: https://github.com/insistime/webpack-guides/tree/1.0.4
【小结】
到这里,学习了
1.webpack-react配置
2.webpack-sass配置
【问题】
到这里,你会发现一个问题,
在开发实践中webpack依赖很多其他npm包,类似这样
  "devDependencies": {
    "@babel/core": "^7.17.5",
    "@babel/preset-react": "^7.16.7",
    "babel-loader": "^8.2.3",
    "css-loader": "^6.7.1",
    "html-webpack-plugin": "^5.5.0",
    "imports-loader": "^3.1.1",
    "sass": "^1.49.9",
    "sass-loader": "^12.6.0",
    "style-loader": "^3.3.1",
    "webpack": "^5.65.0",
    "webpack-cli": "^4.9.1",
    "webpack-dev-server": "^4.6.0",
    "webpack-merge": "^5.8.0"
  },
假设你在维护5个这样的项目,
那意味着有5份类似的依赖,
拿html-webpack-plugin这个依赖来说,
可能会存在5个项目内,
还要维护到最新版本,
确实比较痛苦
【qiao-webpack】
封装了一个npm包,欢迎使用, https://qiao-webpack.vincentqiao.com/#/
- 内置了img的解析规则,且小于4k的文件使用base64编码内置
- 内置了css的解析规则, dev环境下使用style-loader,非dev环境下使用mini-css-extract-plugin
- 内置了sass的解析规则,使用sass-loader解析
- 内置了less的解析规则,使用less-loader解析
- 内置了postcss的解析规则,使用postcss-loader解析
- 内置了react的解析规则,使用babel-loader解析
- 内置了antd的按需加载解析,使用babel-plugin-import实现
- 内置了html-webpack-plugin,用来生成html文件,通过配置文件中的plugins使用
- 内置了mini-css-extract-plugin,用来提取css文件,通过配置文件中的plugins使用
- 使用css-minimizer-webpack-plugin压缩css文件,使用terser-webpack-plugin压缩js文件
【总结】
1.webpack-安装
2.webpack-配置文件
3.webpack-构建
4.webpack-entry
5.webpack-output
6.webpack-module
7.webpack-loader
8.webpack-asset
9.webpack-plugin
10.webpack-mode
11.webpack-watch
12.webpack-devServer
13.webpack-code splitting
14.webpack-react配置
15.webpack-sass配置
16.webpack-开箱即用工具:qiao-webpack, https://qiao-webpack.vincentqiao.com/#/
17.webpack-手册和随笔专栏: https://blog.csdn.net/uikoo9/category_11471307.html