AWS-Route53
Preface
AWS Route 53 is a DNS resolution service.
This article walks through migrating a domain previously hosted on Tencent Cloud to AWS Route 53.
Creating an Application in AWS Route 53
URL: https://us-east-1.console.aws.amazon.com/route53/v2/home?region=us-west-2#Home
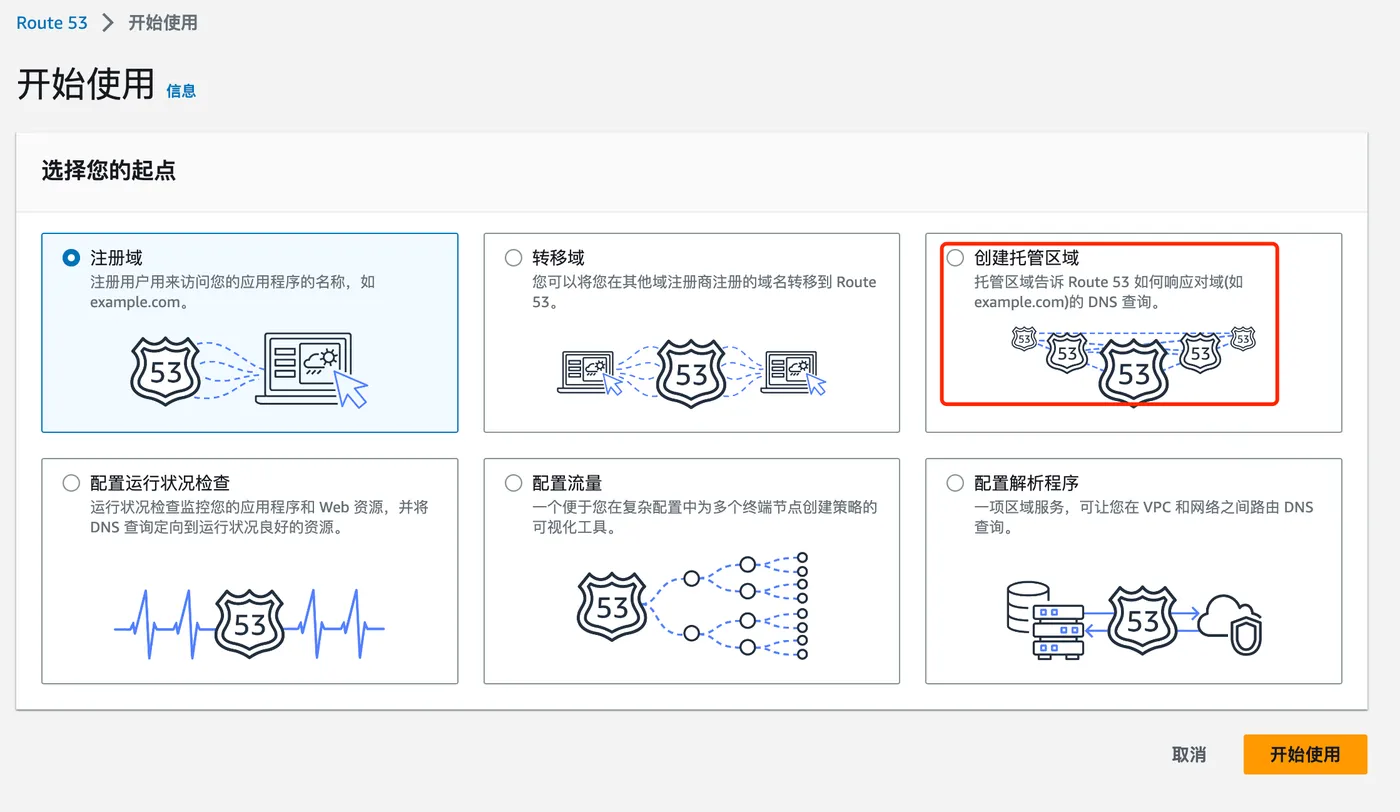
First, you need to create an application in AWS Route 53.
Instead of transferring the domain, select “Create hosted zone”.
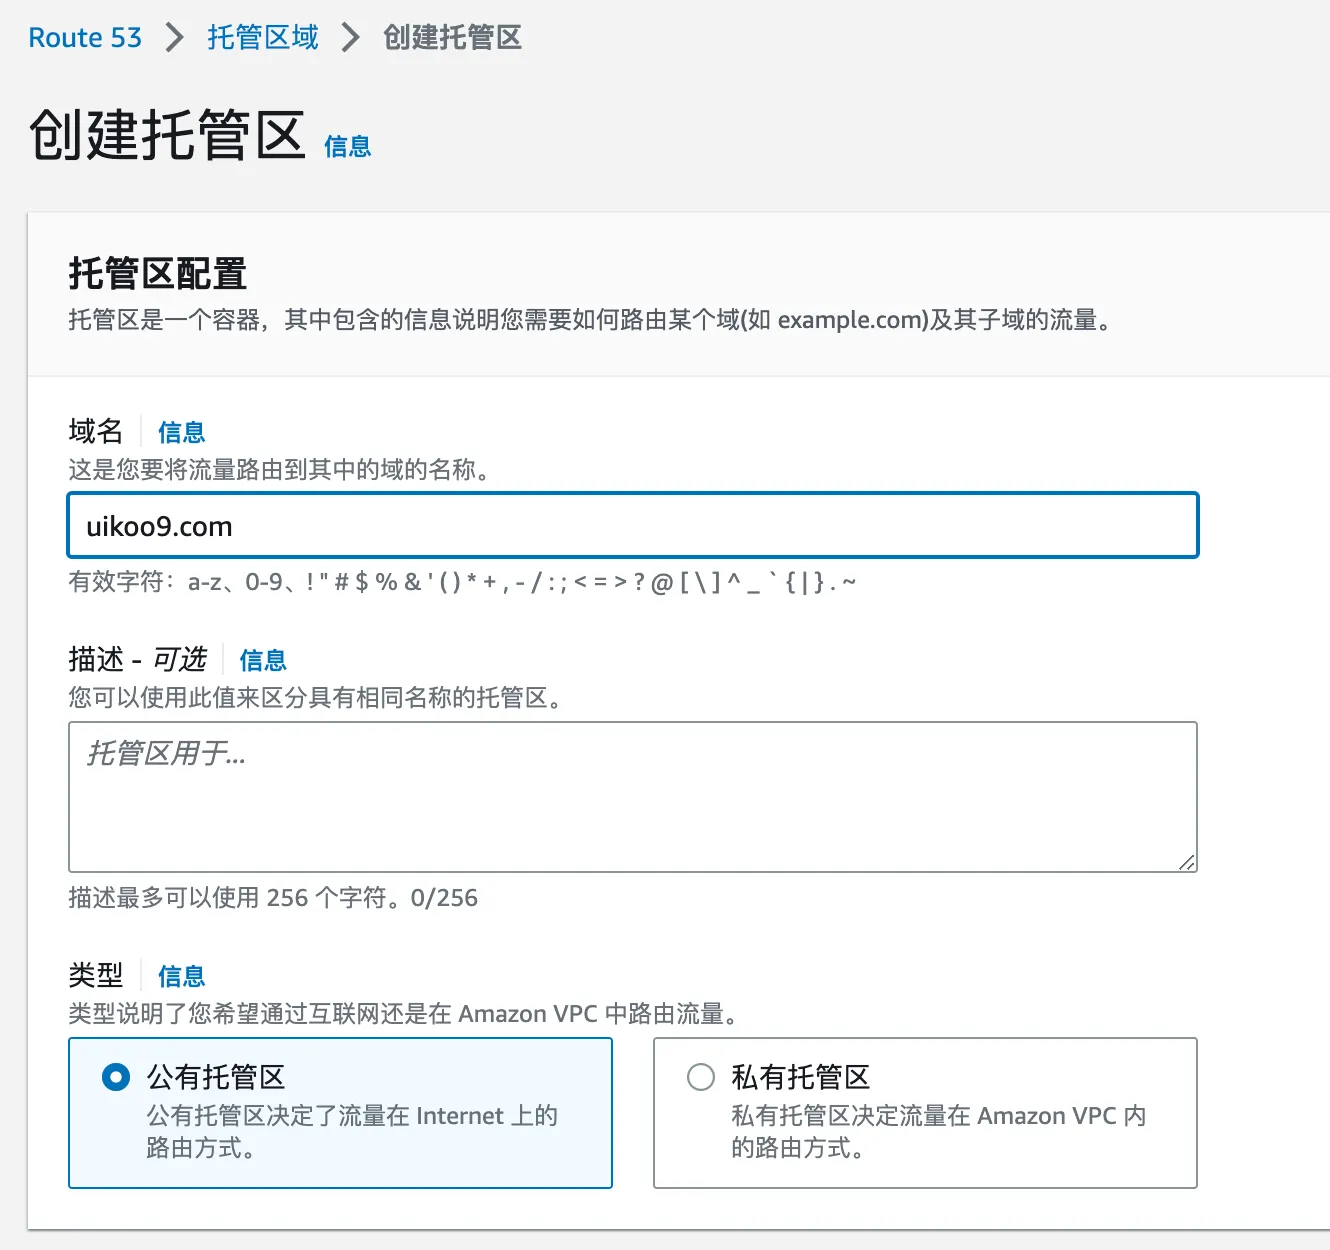
Then fill in the domain name to be hosted.
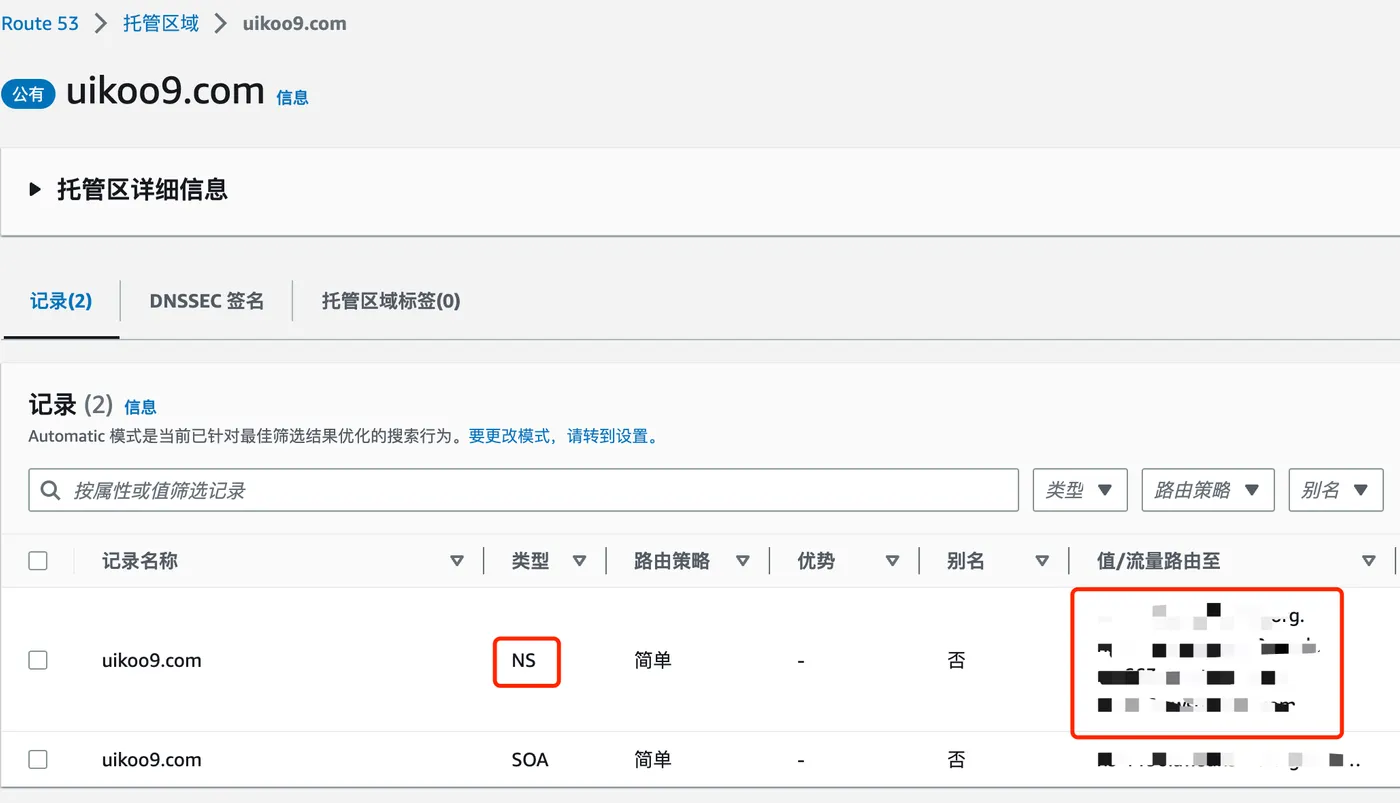
After creation, you’ll see 4 NS record addresses. Copy these.
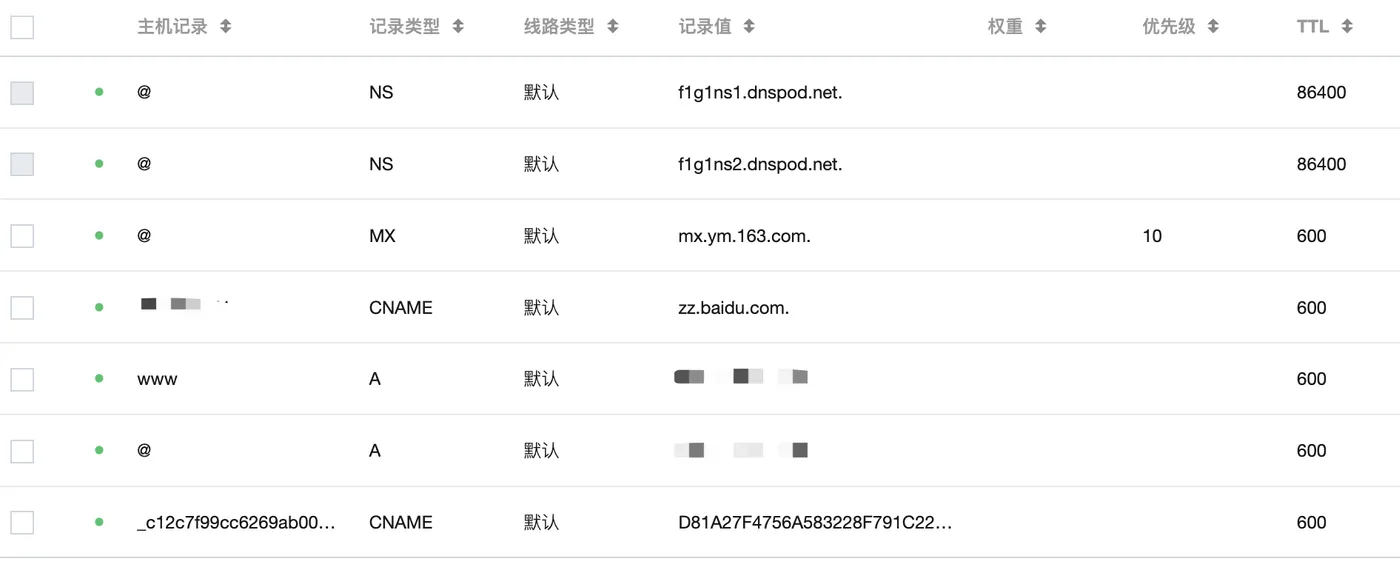
Recording Existing DNS Records
Before migrating away from Tencent Cloud’s DNS,
you need to first record the current DNS entries.
URL: https://console.cloud.tencent.com/cns
Find the current domain’s DNS records and note them down.
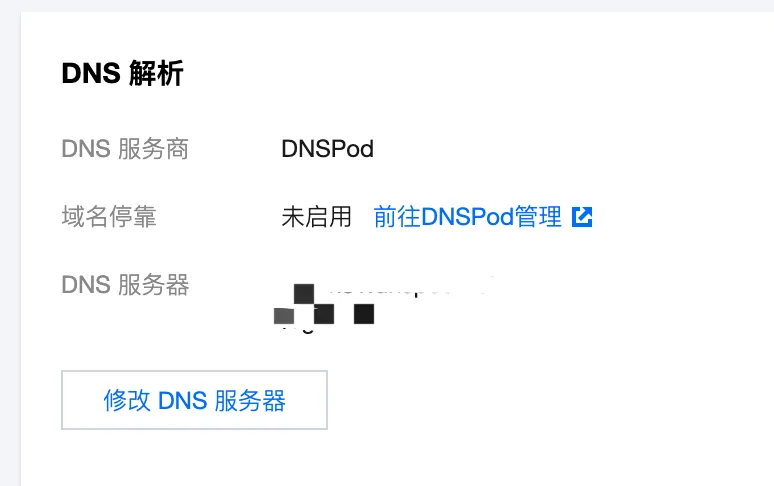
Changing the Domain’s DNS Provider
URL: https://console.cloud.tencent.com/domain
Go to the details of your existing domain.
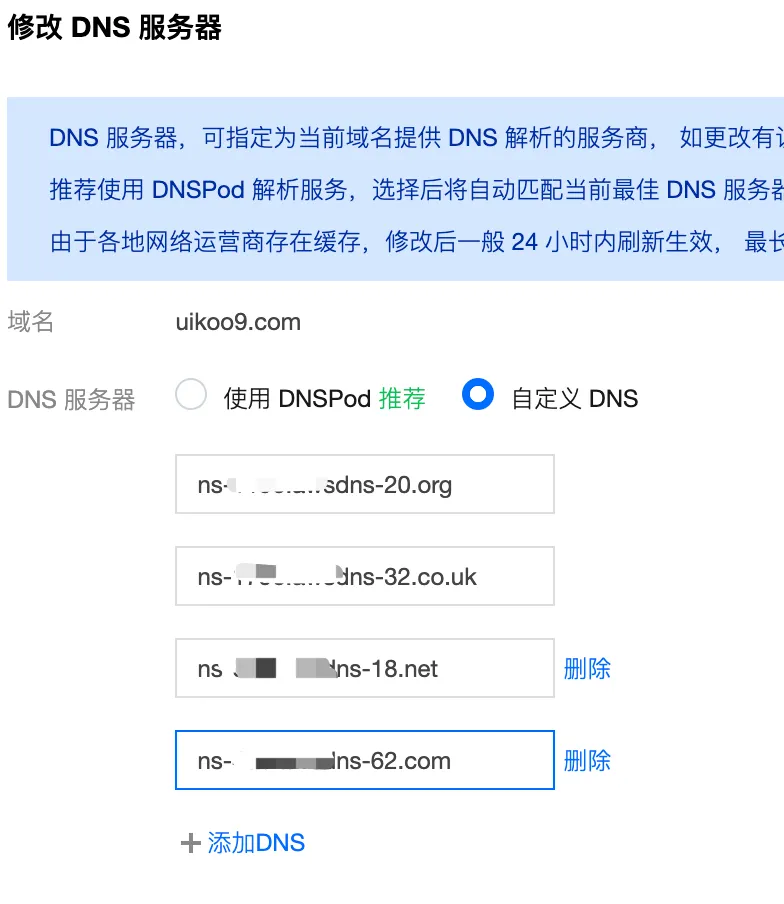
Under DNS resolution, click “Modify DNS server”.
Paste the NS record values from AWS Route 53 here.
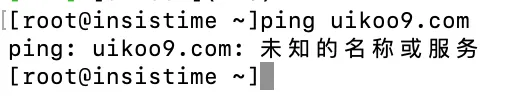
After the change, ping the domain. If it shows “unknown host”, the DNS has been successfully moved to AWS.
Adding DNS Records in AWS
In AWS Route 53, add the DNS records you noted earlier.
Click “Create record”.
Note that in Chinese DNS providers, the root domain uses an ”@” A record, while in AWS you simply leave the record name blank.
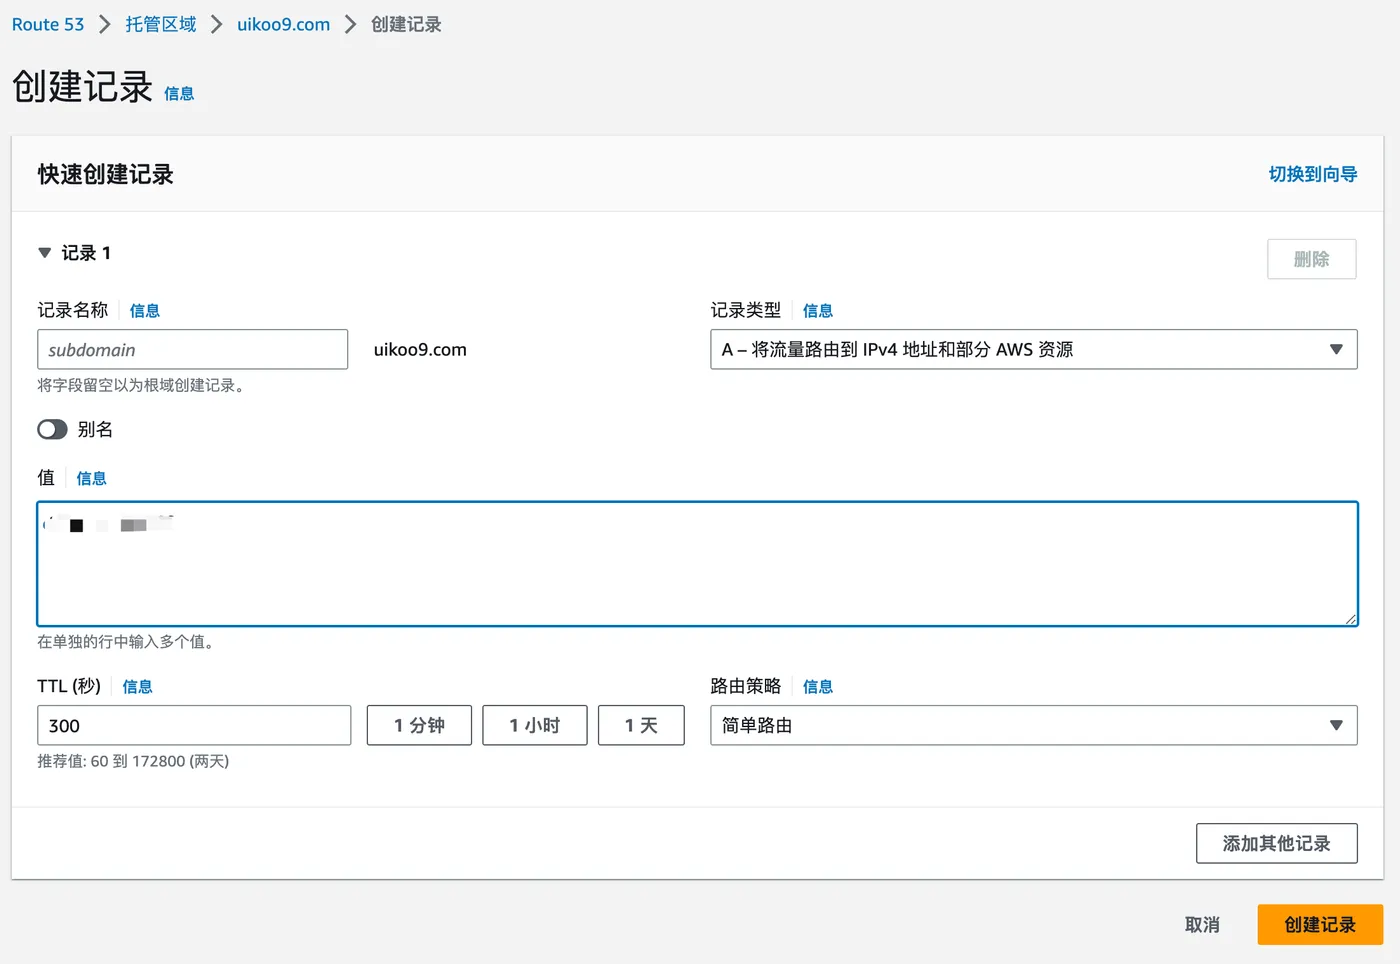
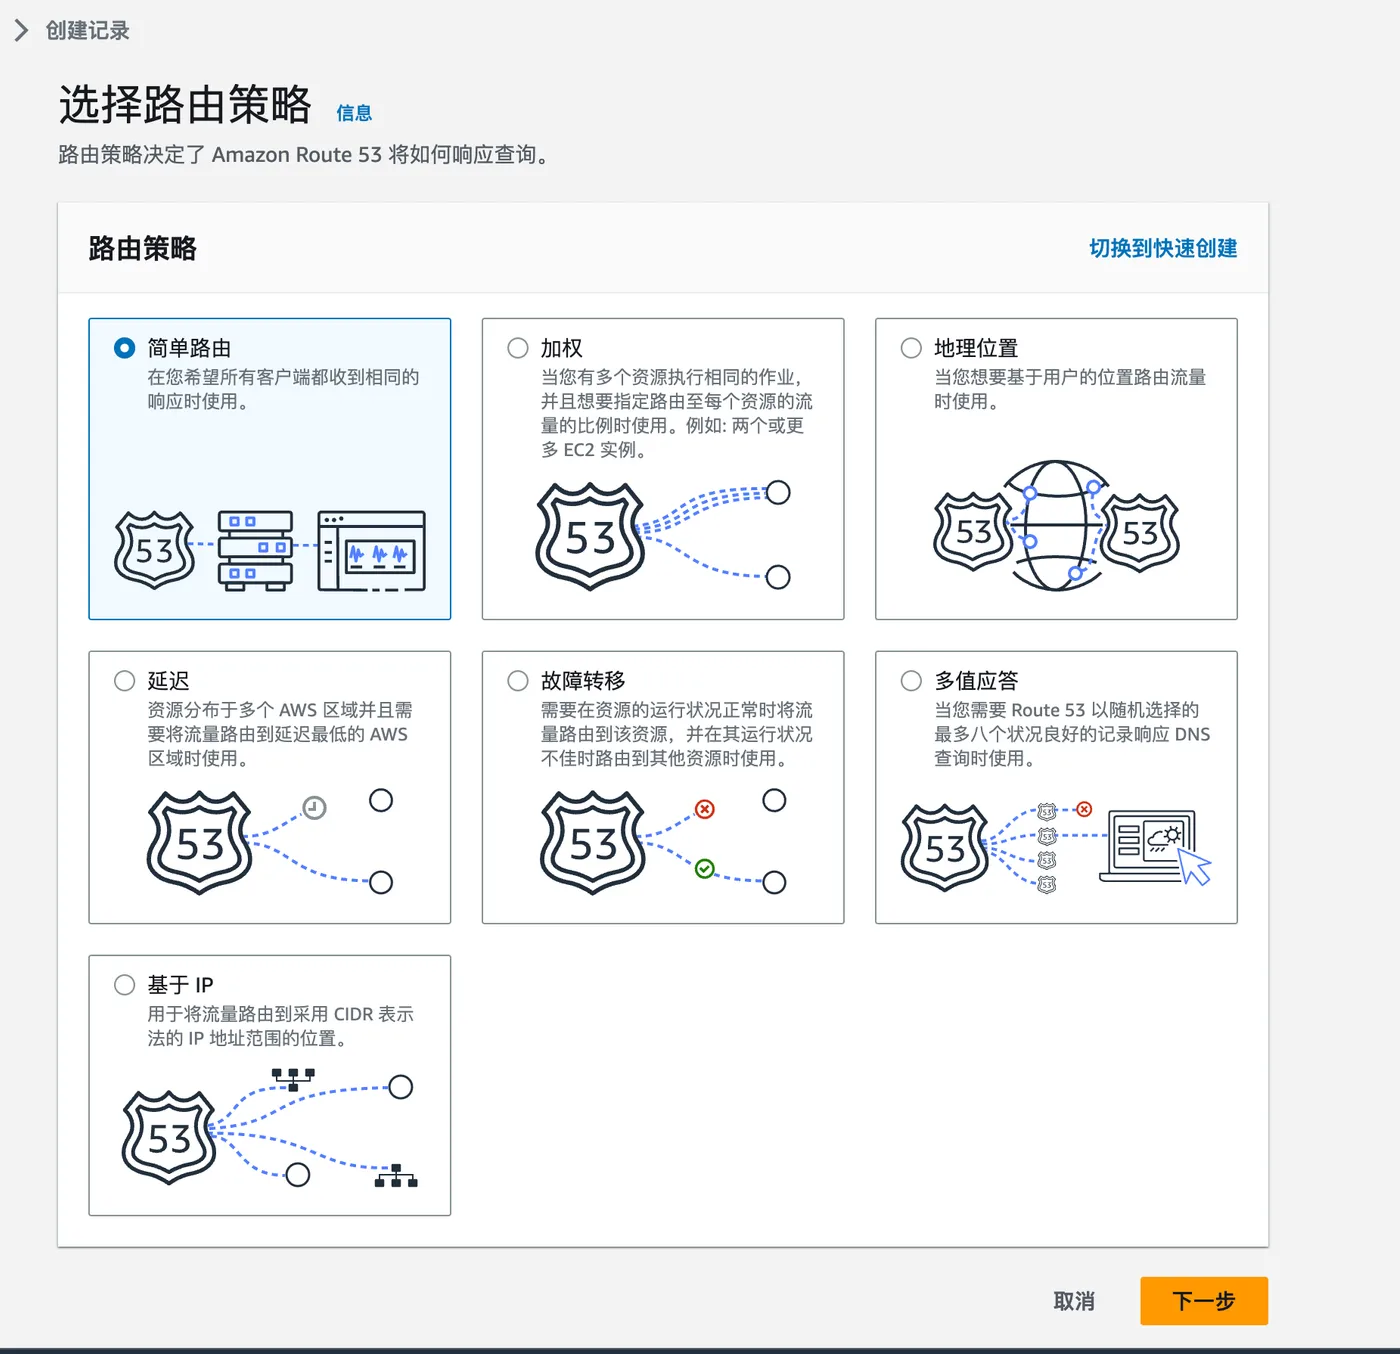
The routing policy in the bottom right is interesting.
Chinese providers typically only offer a default policy, while AWS provides many more options.
Select “Simple routing” here, then click “Create”.
Verifying the Result
Ping the domain again. You should see it resolving properly.
From now on, all DNS management can be done in AWS Route 53.
Using with AWS Resources
If you already have an AWS Load Balancer, you can select it directly when creating a record.
